%20(500%20x%20162%20px)(1).png)
Accessing Your Environment
Logging in to the CLIENT instance
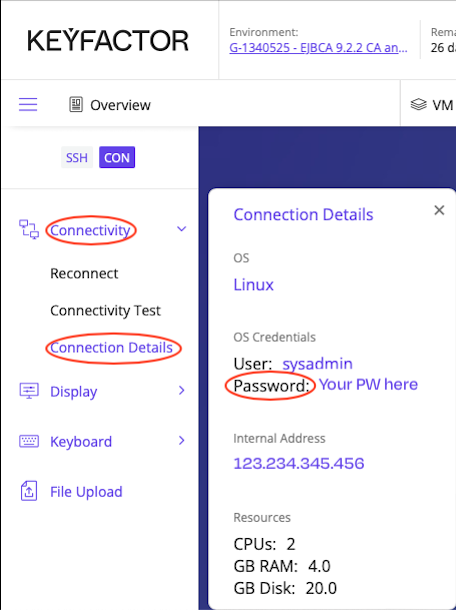
The CLIENT instance, is using a Linux desktop environment. This functions much like a Windows desktop, and requires a login step as well. You can find your login credentials for the desktop by accessing the side bar, and clicking on Connectivity >> Connection Details. This will open a window where the password for the sysadmin user becomes visible. Click anywhere on the desktop, to enter the password then press the ENTER key. Click the “X” to close the “Connection details” window.
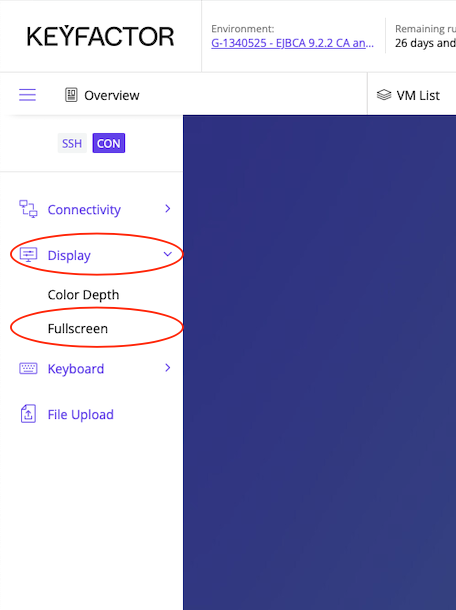
A second method to login will autofill the password for you and put you in Full Screen mode or Using the Keyboard option. This will be useful if you are short on “screen space real estate”.
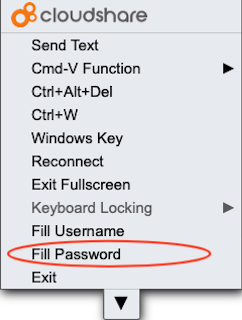
Follow these instructions if you are not using Full Screen mode. Simply click on Keyboard >> Fill Password. This will auto fill the password for you on the desktop and log you into the VM.
Follow these instructions if you wish to login and use Full Screen mode.
Logging in using full screen mode | ||
|---|---|---|
|  |  |
|  | 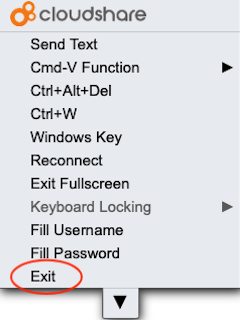 |
Cut/paste from your host machine to the VMs | Using a MAC select this | Using Windows select this |
From time to time you may want to copy text from your local machine to the VM environment. The lab environment can accept local clipboard data. To do this select Keyboard >> Cmd-V Function or CTRL-V Function if on a Windows machine. Then select the option “Send local computer clipboard text”. This will allow you to copy/paste from your computer to the VM environment. | 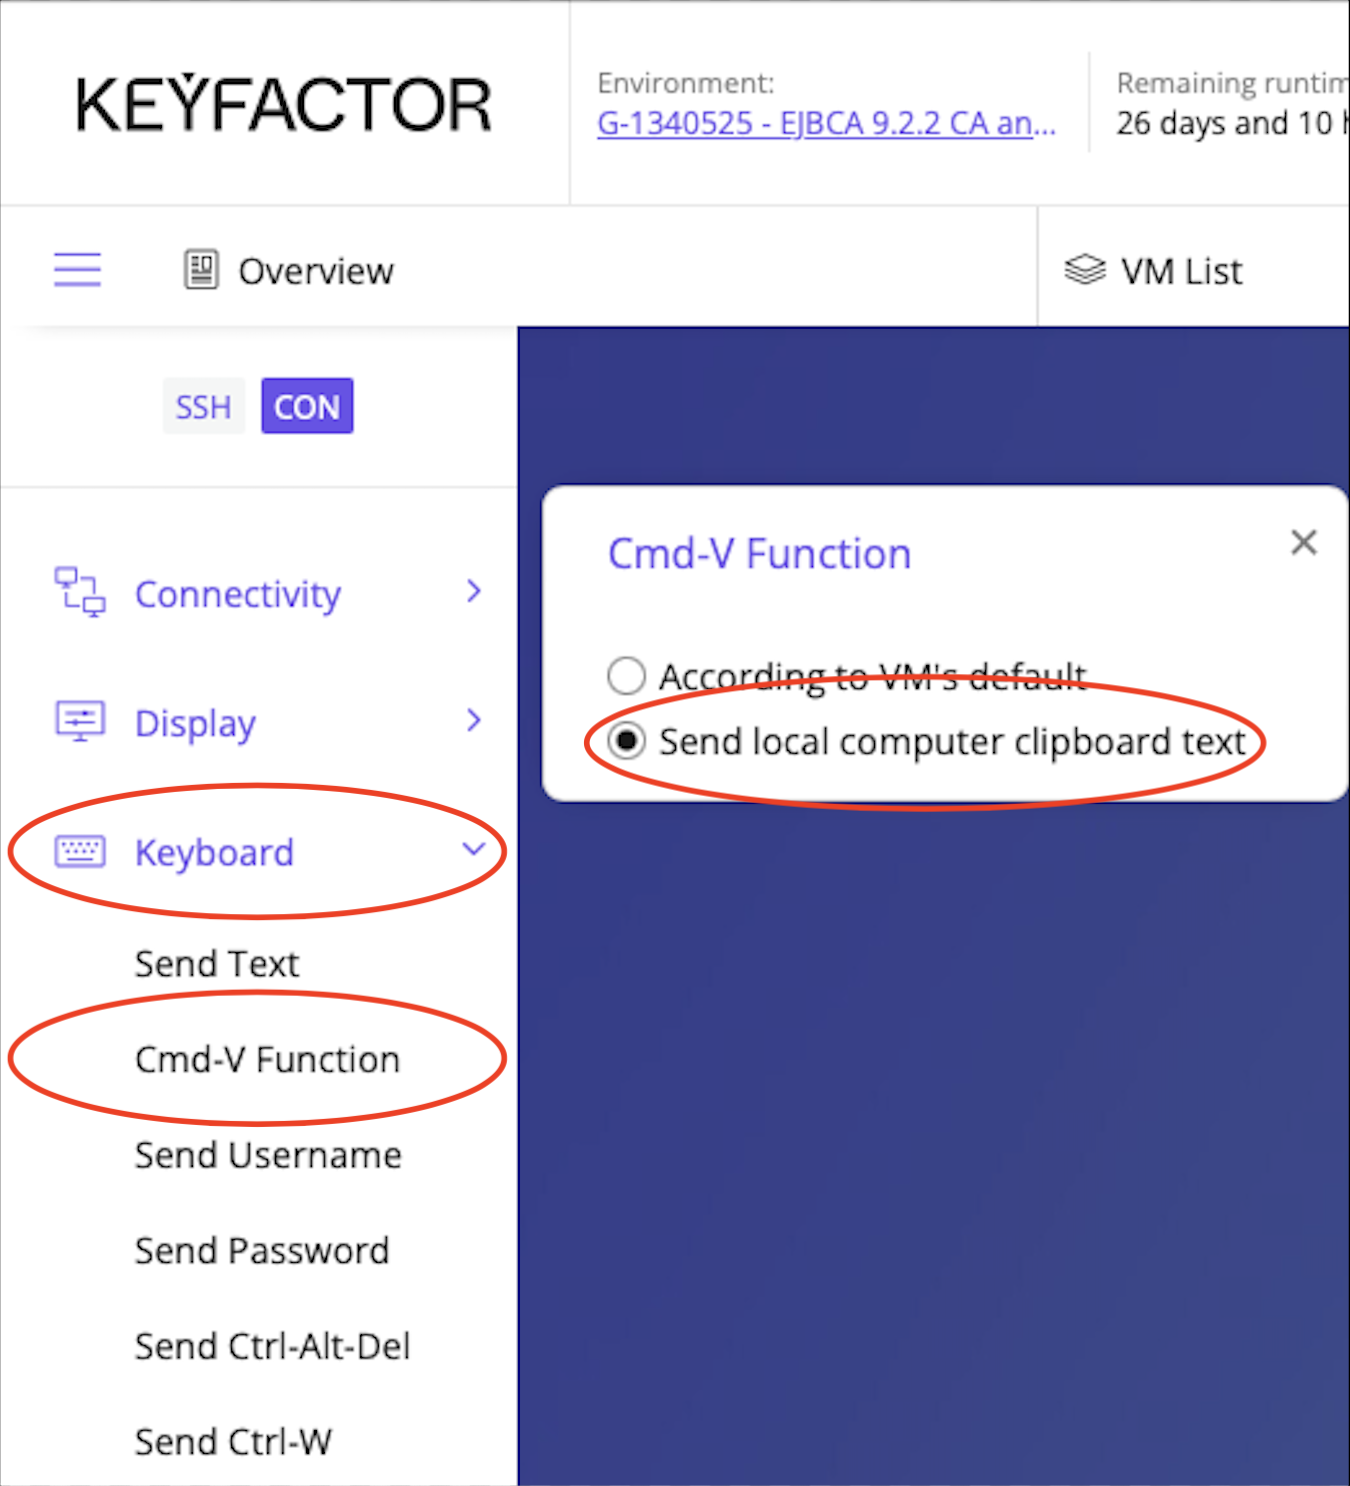 |  |
There is a second option for sending text from your local computer to the VM - that is to use the Keyboard >> Send text option. This option works the same as cut/paste. Position the cursor on the field you wish to send the data to, and select Keyboard >> Send text. A window will pop up, paste your text, and click Send. | 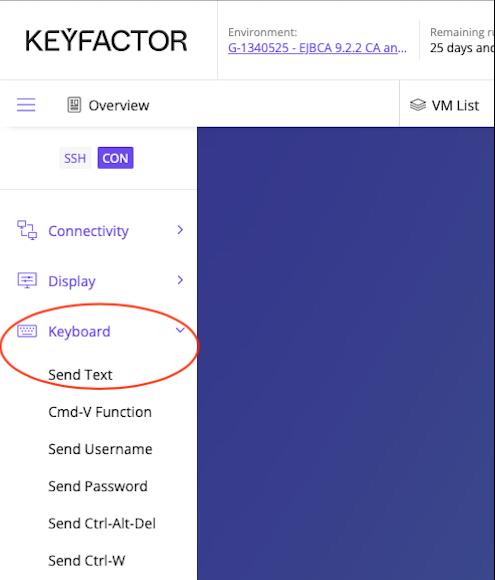 | 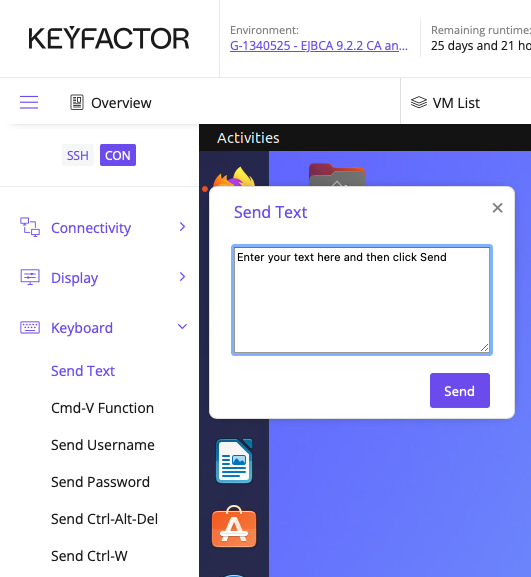 |
Training manual tips | ||
You may find it useful to access the EJBCA Training manual from the CLIENT VM environment. Using the Copy/Paste feature noted above, copy the link of the training manual into the Firefox browser, and click the star to bookmark it. This will allow you to copy/paste “locally” within the VM. The training manual link was provided when you logged into Keyfactor University. | 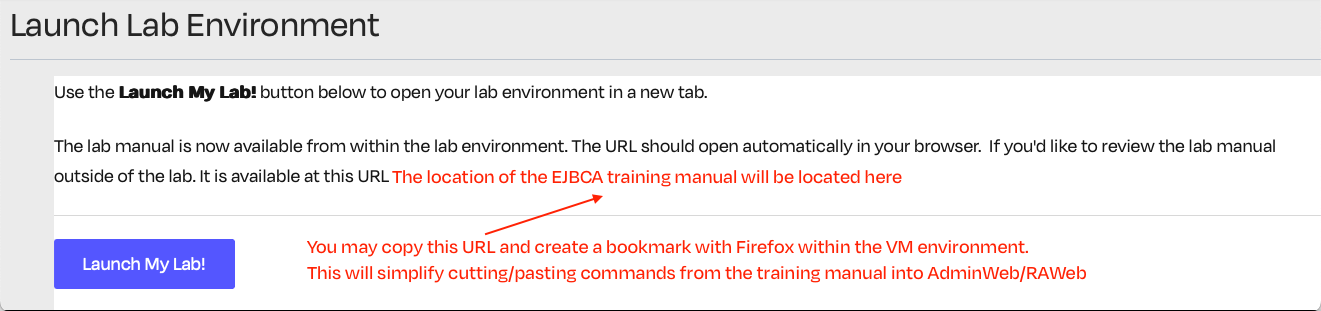 When cutting/pasting sometimes erroneous characters are sent to the VM. If you run into an error when running a cut/paste command for instance, double check what was pasted. | |
Connecting to EJBCA using AdminWeb, and RAWeb via Browser
Throughout the labs you will need to access your environment in various ways that include using the browser and establishing a SSH connection. This section should be used as a reference on how to connect to your environment.
With this lab you have been provided an EJBCA instance that has been preinstalled and configured with the basic components required to get hands on experience configuring and administering an EJBCA instance. Your lab environment contains two virtual machines, Lab Client & an EJBCA Certificate Authority (CA). These machines can be accessed via the tabs at the top of your lab environment browser window. The VA instance will become available during the KeyBindings, and Peer Connectors lab.
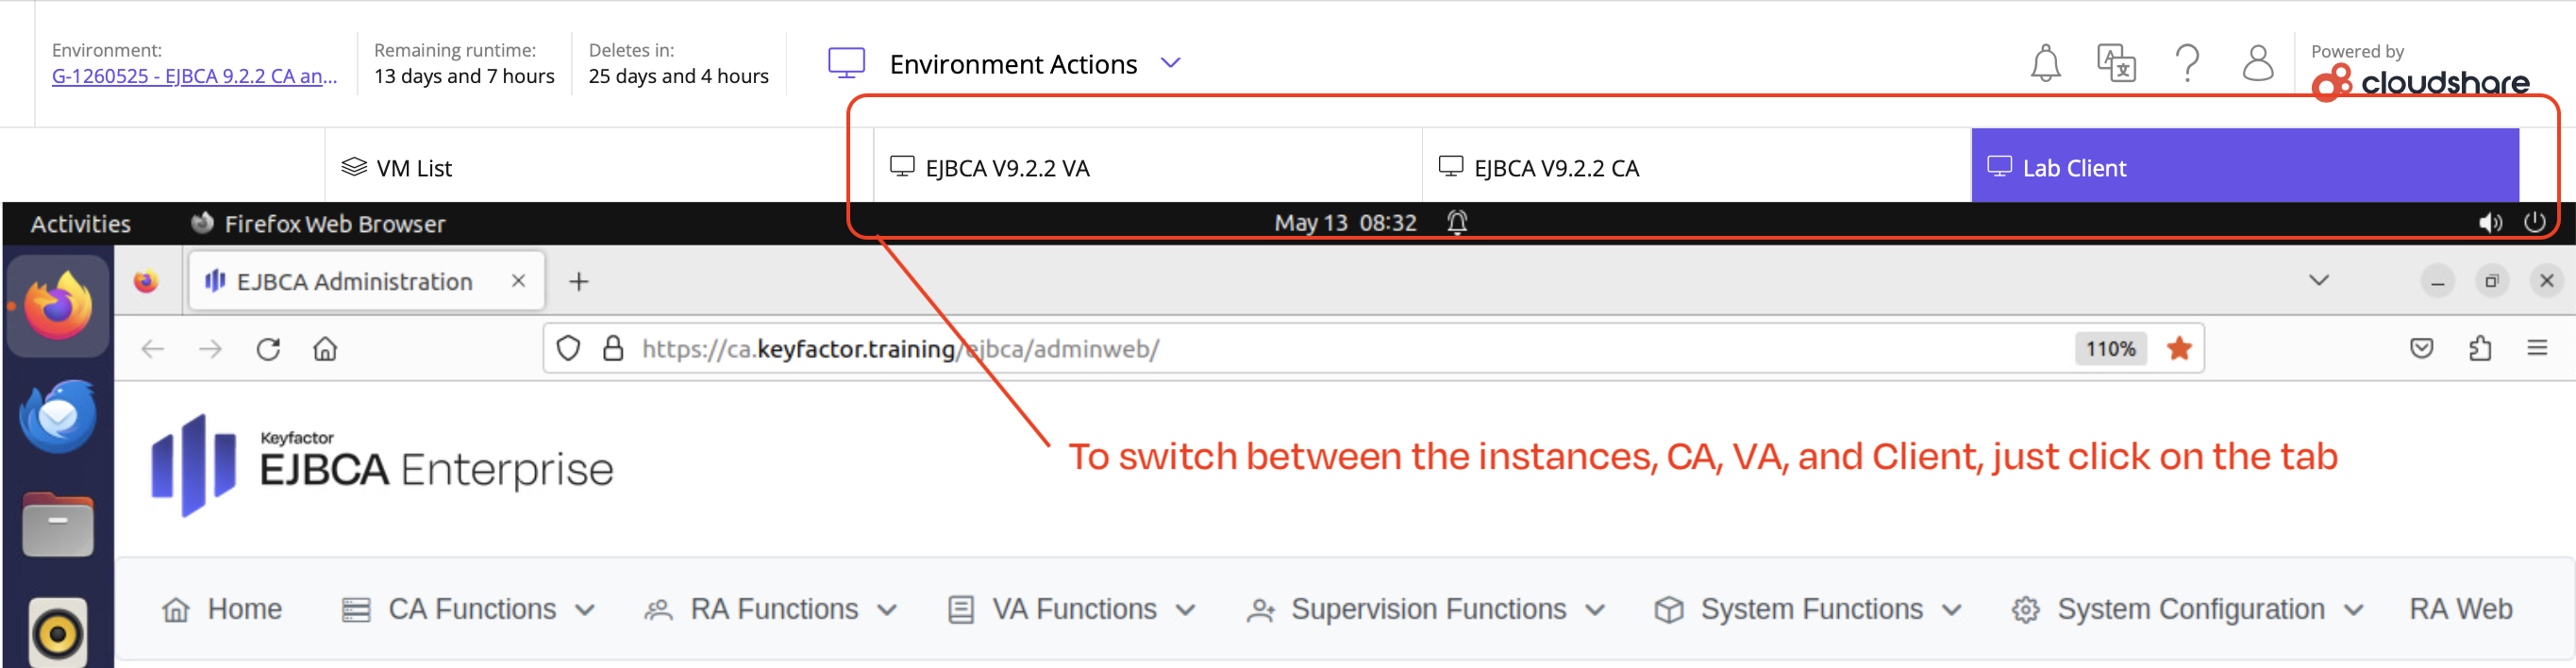
Lab Client
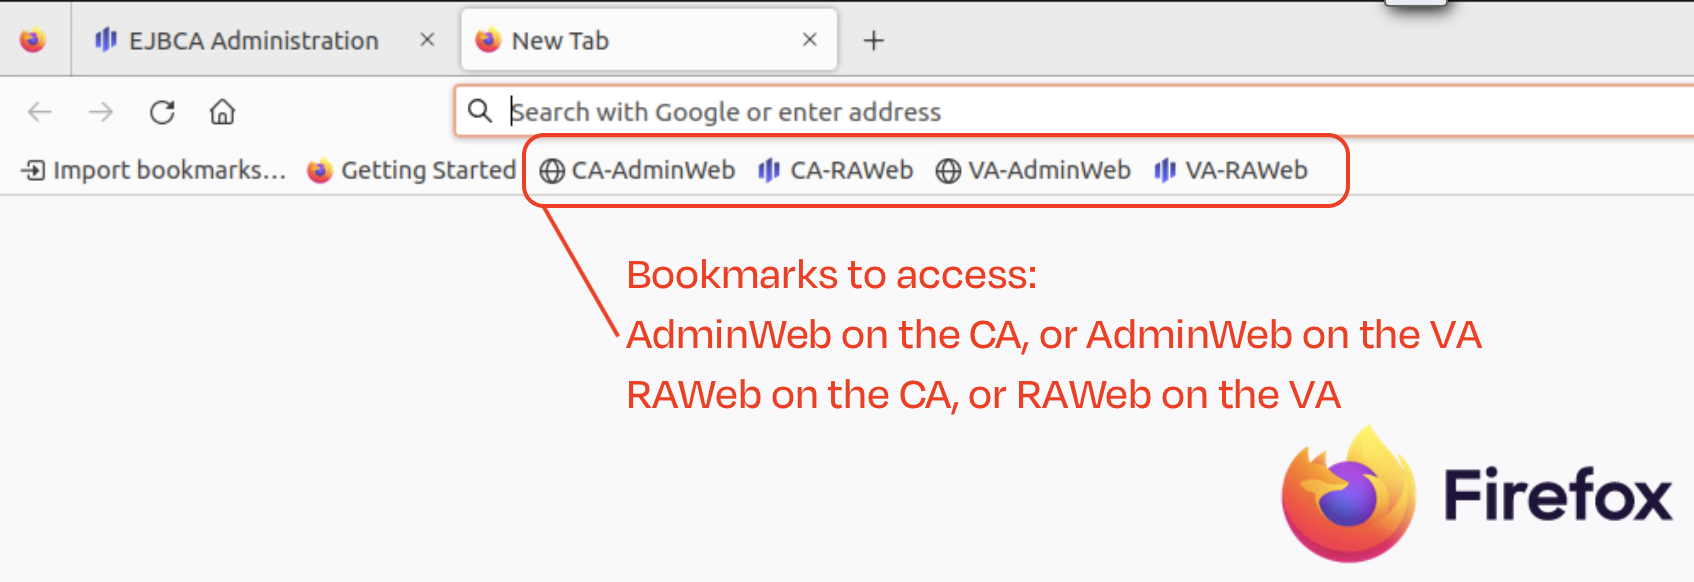
The primary machine you will interact with will be the Lab Client. The Firefox browser has been preinstalled and configured with the SuperAdmin certificate. By launching the browser, you will be logged into the Admin Web interface automatically. If you need to reference the various URLs for EJBCA, they can be found in the table below. Bookmarks have also been included on the Firefox toolbar, for easy access to your CA or VA instances.
CA Instance
The CA instance is were the majority of configuration will occur. During later labs the VA Instance will be added to your lab environment to demonstrate how EJBCA can be deployed with an external Validation Authority (VA), and role separation across multiple instances. The lab instructions will remind you when to use the CA or VA instance.
Interface | AdminWeb | RAWeb |
|---|---|---|
CA URL | ||
VA URL |
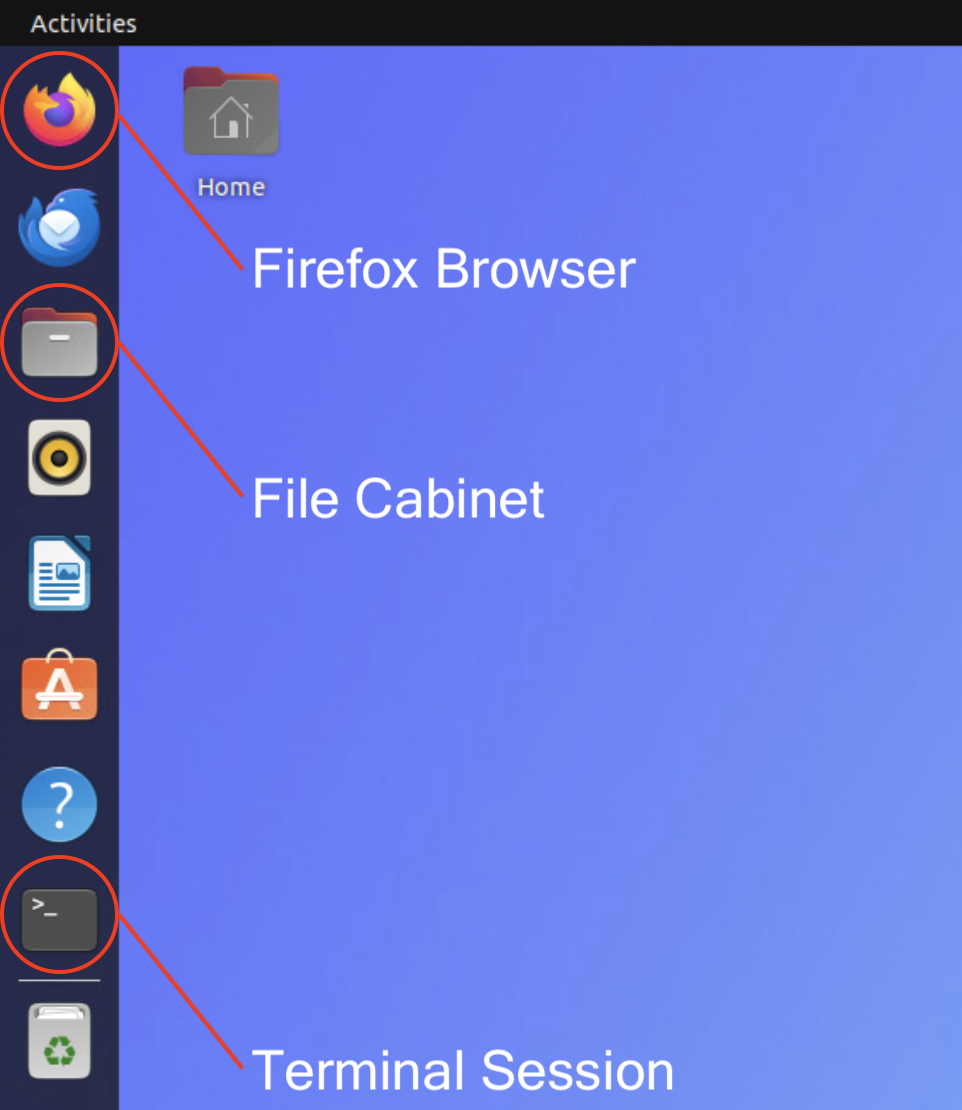
Lab Client Desktop
The lab client is a Linux desktop, this works the same way as the Windows desktop - simply point and click to start an application. The main applications consist of connecting to EJBCA using Firefox, opening a Terminal session to run command line tools, and maybe using the File cabinet to locate a file (this works the same way as Windows file manager).
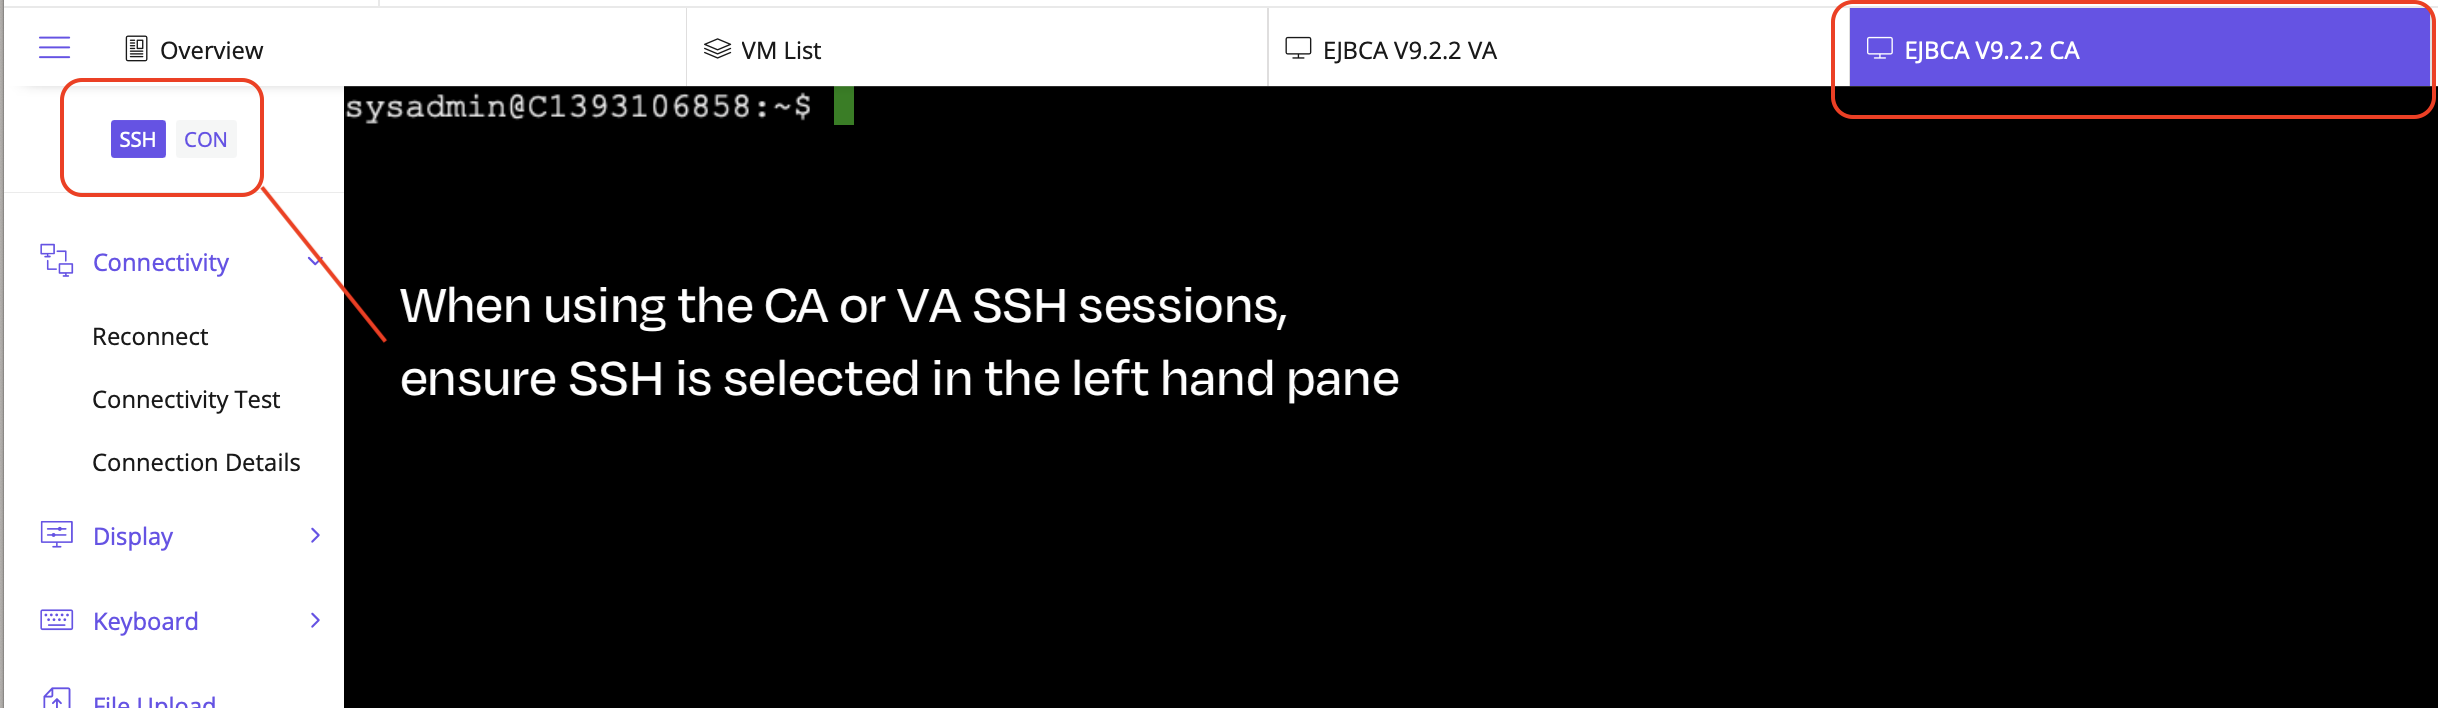
SSH Connection
Finally, when accessing the EJBCA CA via the command line, make sure that your environment is using the SSH connection option available on the left hand side of the screen. Ensure you are on the correct SSH session CA or VA (instructions will guide you in the manual).
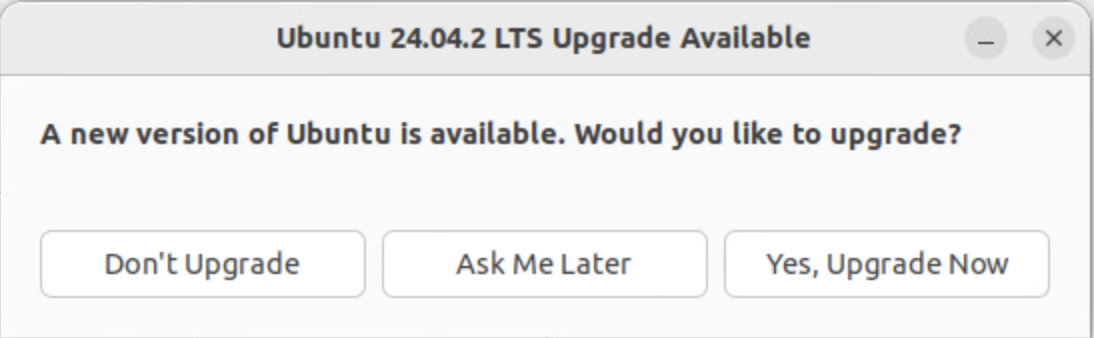
NOTE: If you are prompted that a new version of Ubuntu is available, you can safely disregard this message and click “Don’t Upgrade”.
This (at most) may occur two times. Once when working with labs 1 - 8, and then again during labs 9 - 14 (after the switch step is completed). Click “Don’t upgrade” each time.
If you have any questions regarding the labs, or issues connecting to your lab environment, reach out to training@keyfactor.com. Thanks for joining us today, we hope you enjoy your experience.