%20(500%20x%20162%20px)(1).png)
Root CA
Introduction
Create CA Hierarchy Lab Overview - PART 1, Create the Root CA
Slide Deck: Create CA Hierarchy
Overview: This lab is used to create our EJBCA PKI Hierarchy lab environment, which will be used throughout this course. The Root CA is our trust-anchor, and becomes the point of trust for the PKI. This CA is brought online and used to build out the rest of the PKI. Once the hierarchy is created, the Root is normally brought offline - this of course all depends on the organizations policies regarding its PKI infrastructure.
The Create CA Hierarchy, consists of three parts; creating a Root CA, a Subordinate CA, and an External Subordinate CA.
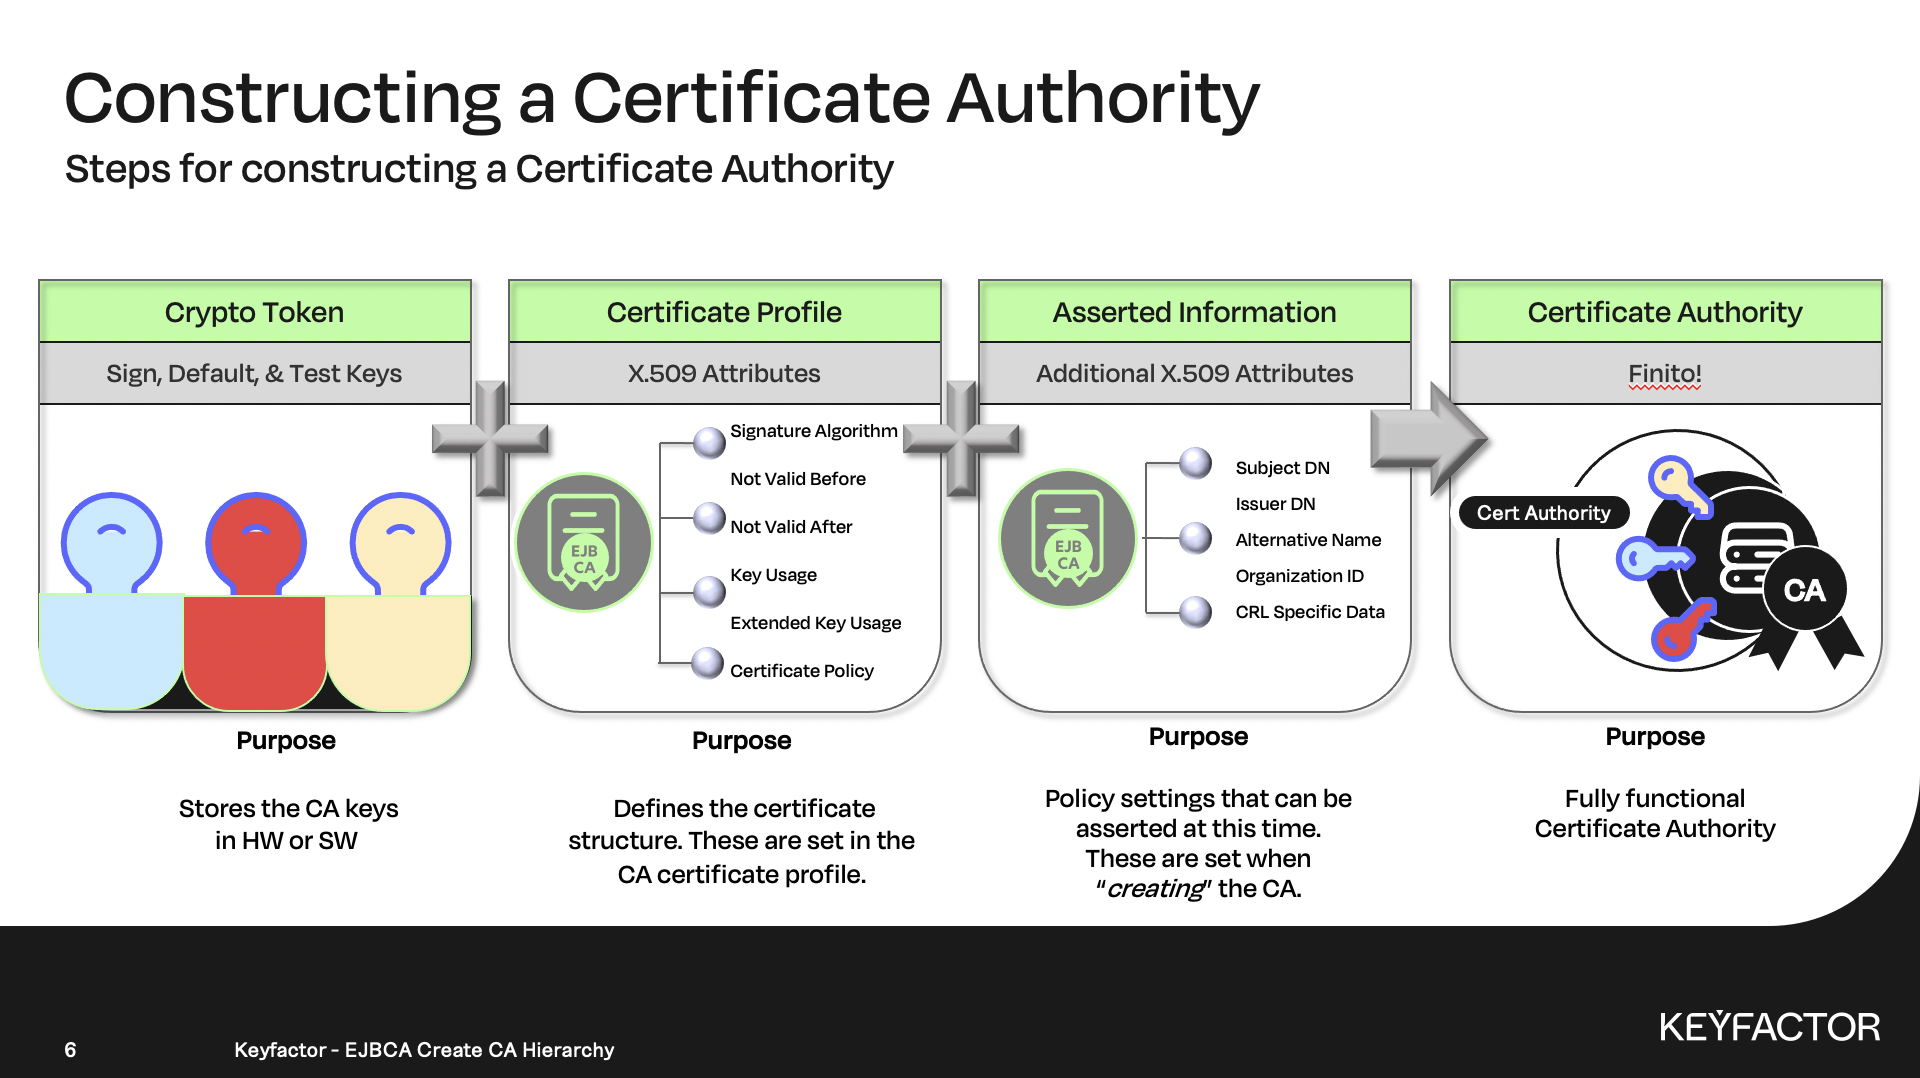
The first part of this lab focuses on creating the Root CA. This part consists of three steps.
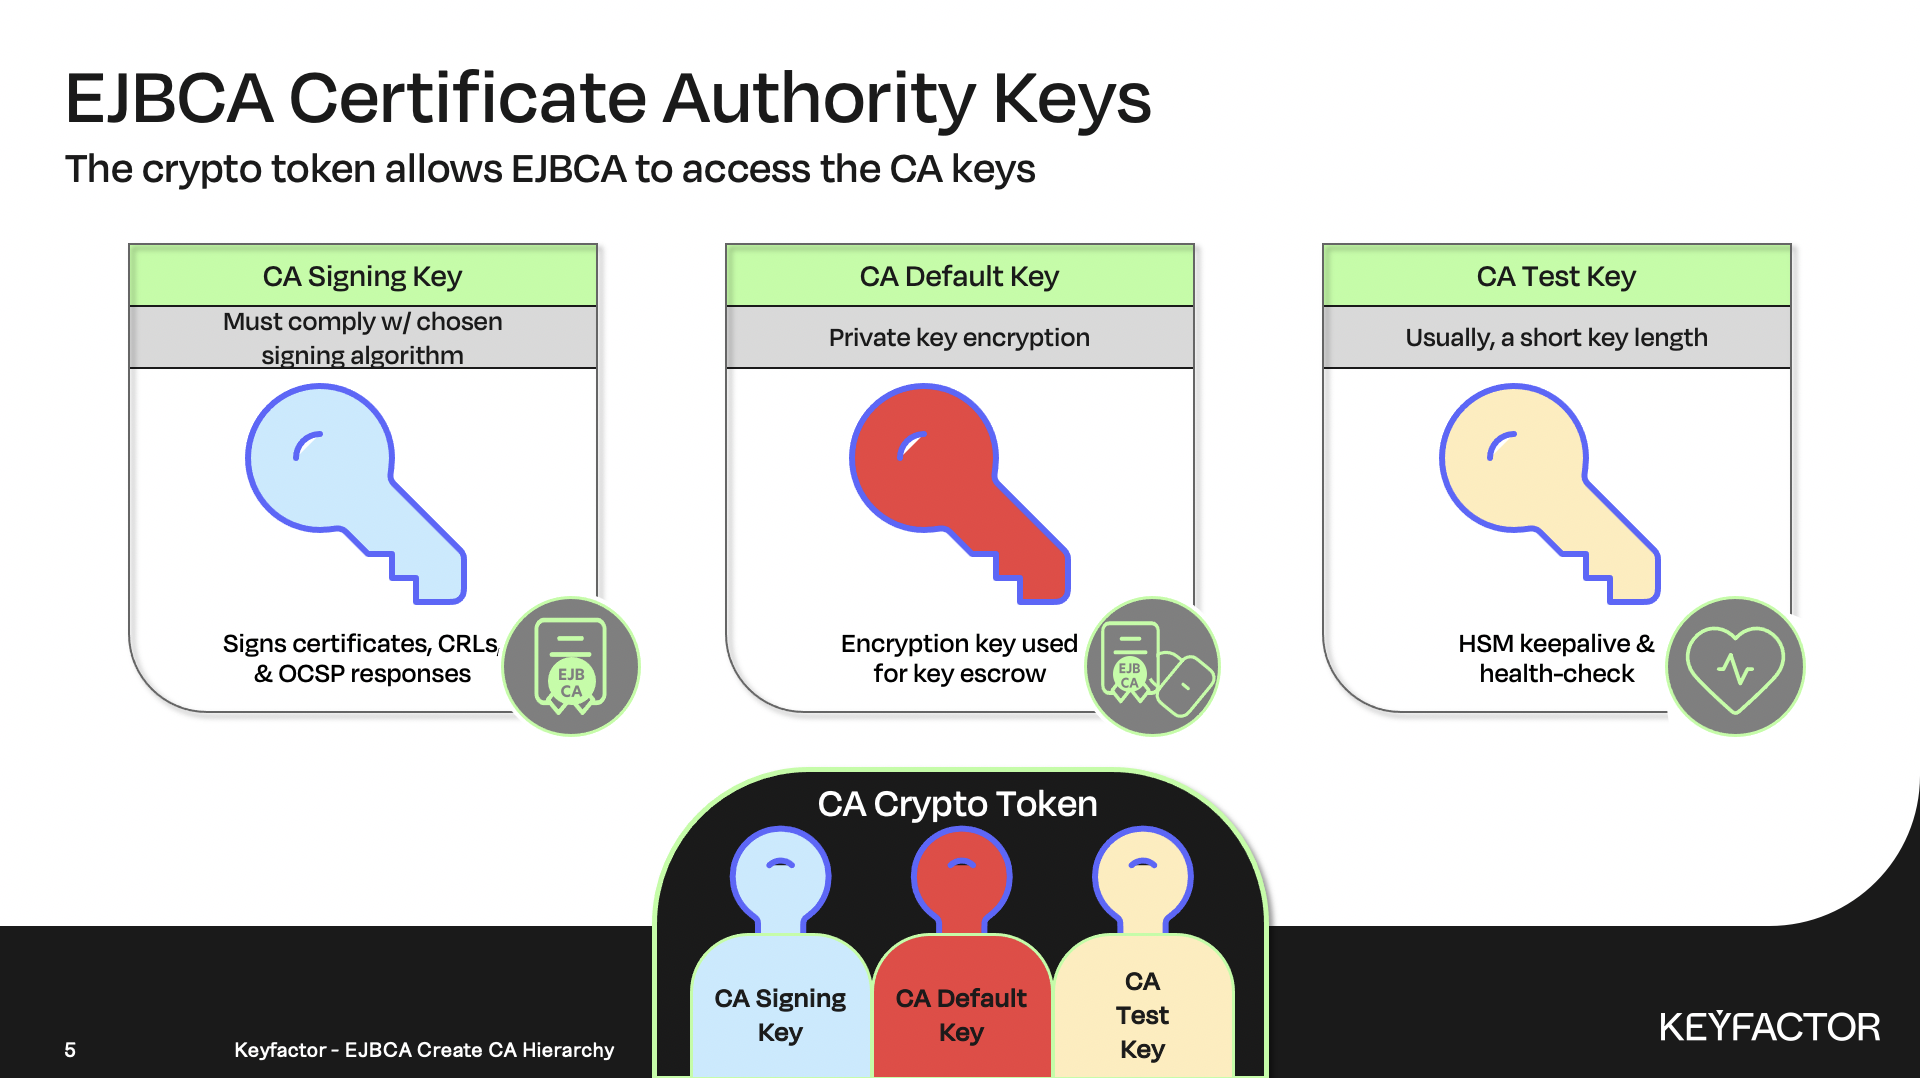
Create a Crypto Token which allows EJBCA to access the Root CA keys.
Clone the Root certificate profile, which is provided as a template with EJBCA, and make modifications required for the lab environment i.e. select key algorithm, and key length etc.
Creating the Root CA, by making modifications specific for the Root CA, adding any asserted information, i.e. DN of the CA, assign the crypto keys to their usage, and configure CRL validity periods.
Slide Reference
Create the crypto token first
Next create the certificate authority
Create Root CA Crypto Token
Open a browser and go to the CA URL https://ca.keyfactor.training/ejbca/adminweb to access Admin Web
Click CA Functions >> Crypto Tokens
Click Create new
In the Name field, enter rootcacryptotoken
In the Type list, select PKCS#11 NG
In the PKCS#11 Reference Type list, select Slot/Token Label
In the PKCS#11 Reference list, select ROOT_CA_SLOT
In the Authentication Code field, enter the password for the slot (password on the training system is foo123)
In the Repeat Authentication Code field, re-enter the password from previous step
Click Save
Enter signKey00001 as the name for the new key, choose RSA 4096 from the list, select Sign and Encrypt for key usage and click Generate new key pair
Click Test for the new key created, the result should be signKey00001 tested successfully
Enter defaultKey00001 as the name for the new key, choose RSA 4096 from the list, select Sign and Encrypt for key usage and click Generate new key pair
Click Test for the new key created, the result should be defaultKey00001 tested successfully
Enter testKey as the name for the new key, choose RSA 1024 from the list, select Sign and Encrypt for key usage and click Generate new key pair
Click Test for the new key created, the result should be testKey tested successfully
Create Root CA Certificate Profile
Click CA Functions >> Certificate Profiles
On ROOTCA click Clone
Enter RootCACertificateProfile and click Create from template
Click Edit on the profile RootCACertificateProfile
In the Available key algorithms list, select RSA
In the Available bit lengths list, select 4096 bits
In the Signature Algorithm list, select SHA256WithRSA
In the Validity or end date of the certificate field, enter 20y 6mo
Uncheck the Use checkbox for Authority Key ID
Uncheck the Use… checkbox for Subject Alternative Name
Uncheck the Use… checkbox for Issuer Alternative Name
Uncheck the Use checkbox for LDAP DN order
Keep the other values as default
Click Save
Create Root CA
Click CA Functions >> Certification Authorities
In the Add CA field, enter Root CA and click Create
In the Crypto Token list, select rootcacryptotoken
In the defaultKey list, select defaultKey00001
In the certSignKey list, select signKey00001
In the testKey list, select testKey
In the Subject DN field, enter CN=Root CA, O=PrimeKey Solutions AB, C=SE
In the Certificate Profile list, select RootCACertificateProfile
In the Validity (*y *mo *d *h *m *s) or end date of the certificate field, enter 20y 6mo
Uncheck the checkbox for LDAP DN Order
In the CRL Expire Period field, enter 2d
In the CRL Issue Interval field, enter 1d
In the CRL Overlap Time field, enter 0m
In the Monitor if CA active (healthcheck), check Activate
Click Create