%20(500%20x%20162%20px)(1).png)
Web Services
Introduction
Integration - Web Services
Slide Deck: Integration
Overview:
EJBCA has an extensive SOAP Web Services Interface that can be used for remote scripting and to integrate EJBCA with other applications that support Web Services API.
The SOAP Web Services interface requires client certificate authentication and that certificate is added to an appropriate administrator role, in the same way as access to the Admin GUI does.
This section will show how to use clientToolBox as a WS client.
The first part of the lab will create the Web Services administrator login account. This account is used to perform the 2nd part of the lab.
The second part of the lab will:
create an entry in the database
issue a certificate to that entry
lookup the user in the database
revoke the newly created user
lookup the user in the database
Slide Reference
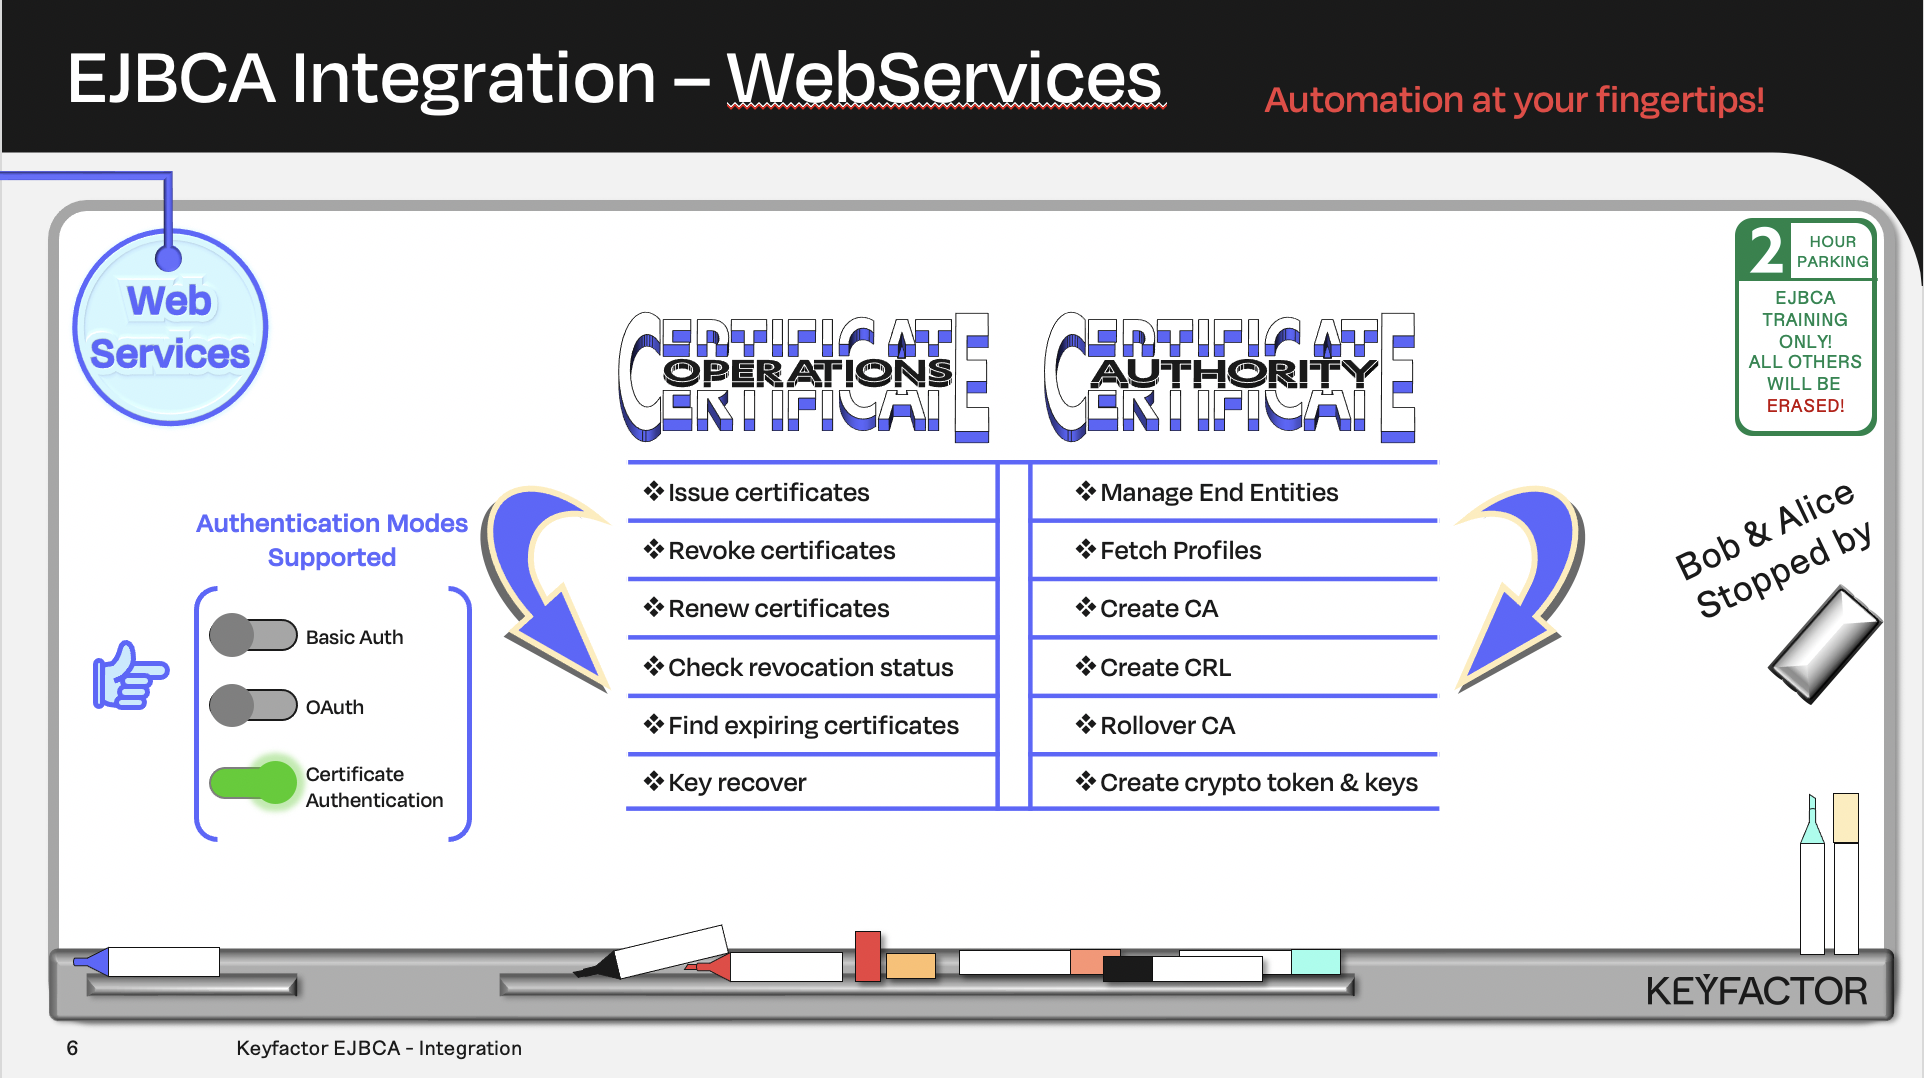
Certificate and CA operations availalble using Webservices
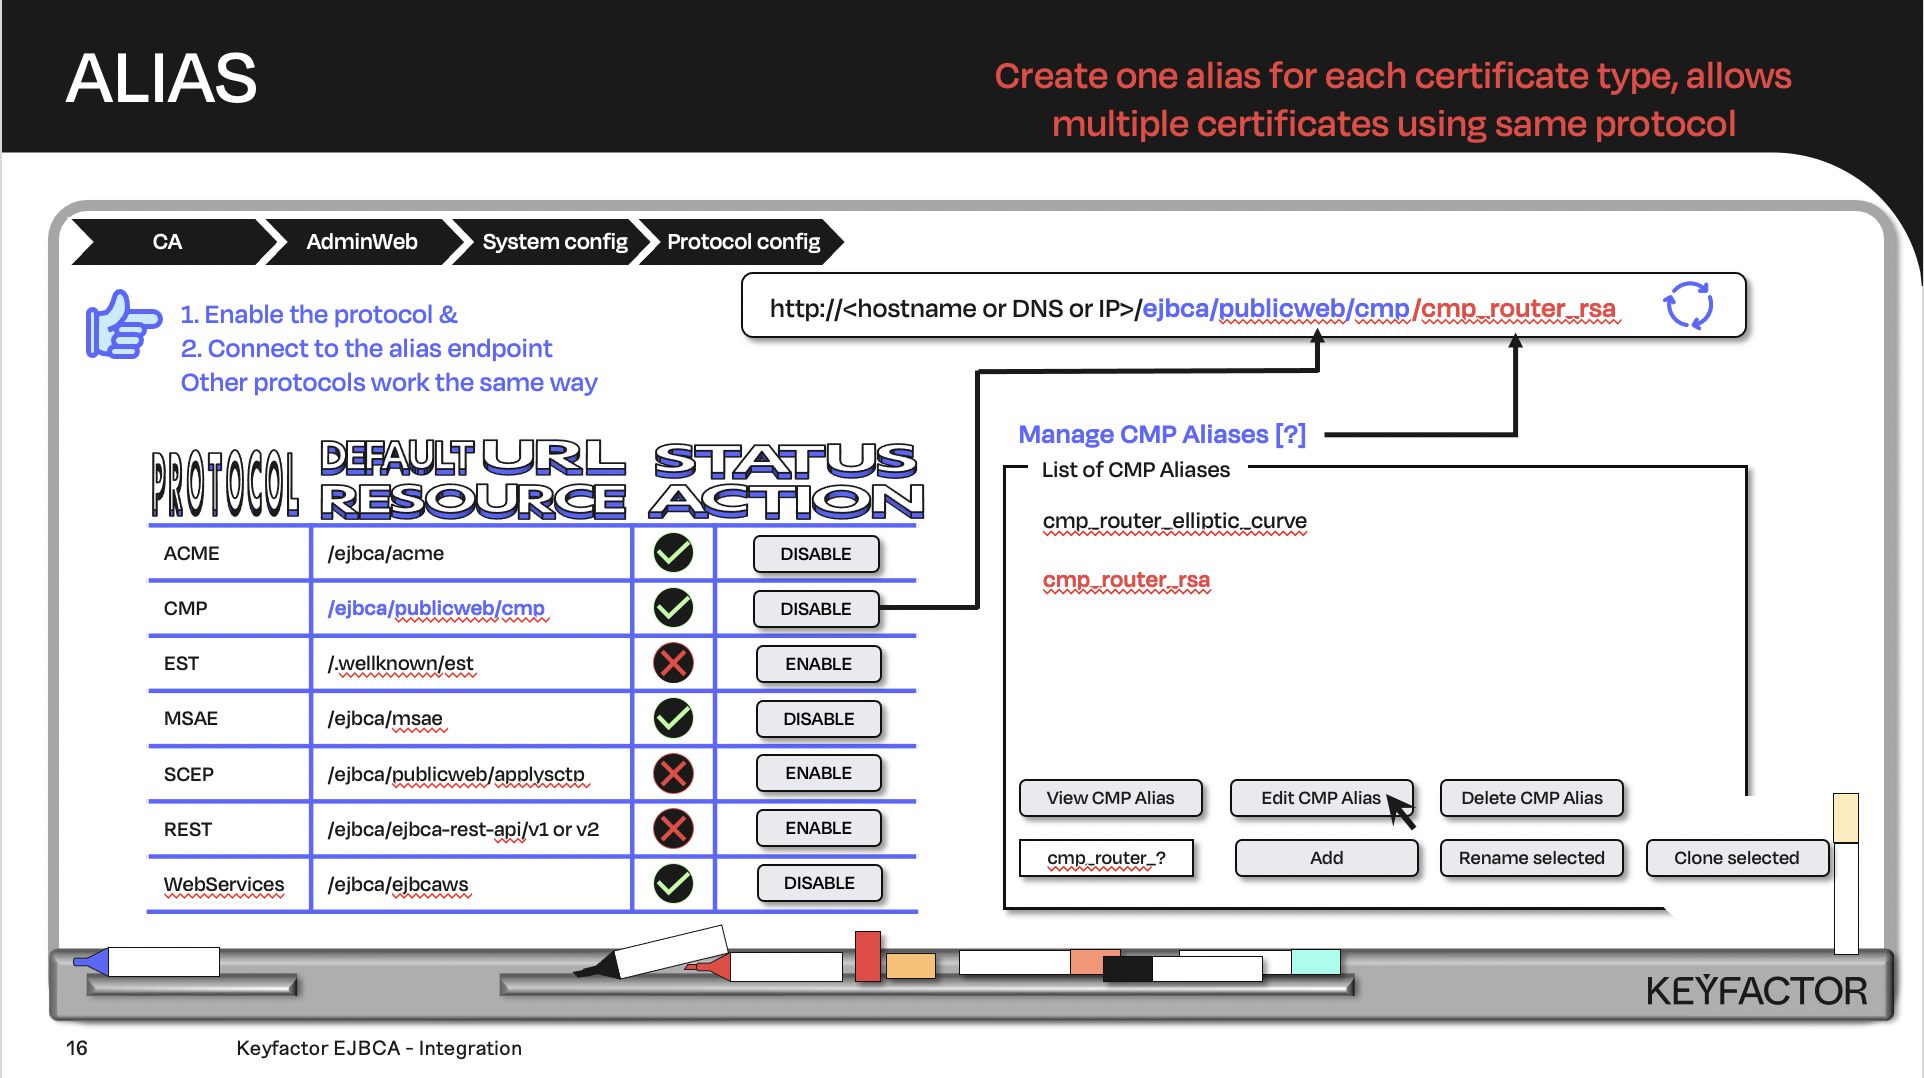
Create the URL with the default URL resource + the protocol alias; the client will contact the URL
Reminder you can visit the Accessing Your Environment page for details on how to connect to your Admin web portal
Enable Web Service Protocol
Ensure that the web service protocol is enabled:
Open a browser and access your Admin Web Portal
Click System Configuration >> System Configuration
Click on the Protocol Configuration tab
Ensure Web Service status is Enabled
Create WS Client End Entity
Create a NEW entry called training_ejbcawsracli. This end-entity will be used to authenticate to EJBCA, and create other end-entities and certificates using the WebServices protocol. Only the end-enitity is created at this point, and will be in NEW status. Follow these steps to create the training_ejbcawsracli end entity.
Open a browser and access your Admin Web Portal
Click RA Functions >> Add End Entity
In the End Entity Profile list, select TLSClientEndEntityProfile
In the Username field, enter training_ejbcawsracli
In the Password field, enter foo123
In the Confirm Password field, enter foo123
In the CN, Common name field, enter training_ejbcawsracli
In the Certificate Profile list, select TLSClientCertificateProfile
In the CA list, select Management CA
In the Token list, select P12 file
Click Add
Register WS Client as Administrator
Add the Webservices user training_ejbcawsracli to the proper role; in this case the Super administrator role.
Open a browser and access your Admin Web Portal
Click System Functions >> Roles and Access Rules
On Super Administrator Role, click Members
In the Match With list, select X509: CN, Common name
In the CA list, select ManagementCA
In the Match value field, enter training_ejbcawsracli
Click Add
Reminder you can visit the Accessing Your Environment page for details on how to connect via SSH
Enroll the WS admin and generate WS Client Keystore
Create the certificate (P12 file) for the Webservices entry training_ejbcawsracli using the EJBCA RAWeb. Follow these steps to generate the WS client keystore and certificate.
Open a browser and click RA Web, from the ribbon menu across the top of page
Select Enroll >> Use Username
Enter training_ejbcawsracli for the userName
Enter foo123 for the enrollment code
Click Check
Click Download PKCS#12, the P12 file will be downloaded to /home/sysadmin/Downloads - the name of the file is training_ejbcawsracli.p12
Configure clientToolBox WS Client
Modify the web services client properties file. This file is used by the web services client and identifies the location of the P12 file for the web services user. Follow these steps to configure the clientToolBox WS client:
Using the TERMINAL app located on the desktop change to the clientToolBox directory:
cd /home/sysadmin/clientToolBoxOpen the file ejbcawsracli.properties:
vim ejbcawsracli.propertiesSet the following values in ejbcawsracli.properties, make sure to set the password that was used when the end entity was added:
BEWARE OF LEADING OR TRAILING SPACES WHEN EDITING THE FILE.
THIS CAN CAUSE ERRORS WHEN RUNNING THE NEXT FEW COMMANDS.
For example a space after the password, will cause errors.
ejbcawsracli.url = https://ca.keyfactor.training/ejbca/ejbcaws/ejbcaws
ejbcawsracli.keystore.path = /home/sysadmin/Downloads/training_ejbcawsracli.p12
ejbcawsracli.keystore.password = foo123
Remember to remove the # symbol at the beginning of the line when editing the ejbcawsracli.properties file.
Some helpful vi commands:
a - insert characters after the current position
i - insert characters at the current position
x - delete the current character
^ - goto beginning of the current line
$ - goto end of the current line
:wq! - save and close the file
Web Services Commands
Run the following command to show functions available in the clienToolBox WS client:
NONE./ejbcaClientToolBox.sh EjbcaWsRaCliResult:
NONEUsage: edituser | finduser | findcerts | pkcs10req | pkcs12req | certreq | revokecert | revokecertwithmetadata | getpublisherqueuelength | revoketoken | revokeuser | checkrevocationstatus | generatenewuser | createcrl | cacertrequest | cacertresponse | customlog | getprofile | createcryptotoken | generatectkeys | createca | importcacert | updatecacert | addadmintorole | removeadminfromrole | getexpiredcerts | getexpiredcertsbyissuer | getexpiredcertsbytype | stress | keyrecover | keyrecoverenroll | getremainingnumberofapprovals | getClientToolBoxVersionAdd an end entity via Web Services protocol. The end entity will have a status of NEW.
You will see a line stating “User ‘WebService-Cli-User1’ has been added/edited”.NONE./ejbcaClientToolBox.sh EjbcaWsRaCli edituser WebServiceCli-User1 foo123 false \ "CN=WebService CLI User1,O=PrimeKey Solutions AB,C=SE" NULL NULL \ "Sub CA" 1 P12 NEW TLSClientEndEntityProfile TLSClientCertificateProfileIssue PKCS#12 file. The end entity will have a status of GENERATED.
You will see a line stating “KeyStore generated, written to WebService-Cli-User1.p12”.NONE./ejbcaClientToolBox.sh EjbcaWsRaCli pkcs12req WebServiceCli-User1 foo123 2048 RSA NONELookup the added user. The details for the entry will be displayed, with a status of GENERATED.
NONE./ejbcaClientToolBox.sh EjbcaWsRaCli finduser USERNAME EQUALS WebServiceCli-User1Revoke the user. You will see a line stating “User revoked successfully”.
NONE./ejbcaClientToolBox.sh EjbcaWsRaCli revokeuser WebServiceCli-User1 REV_UNSPECIFIED falseLookup the the user again. The details for the entry will be displayed, with a status of REVOKED.
NONE./ejbcaClientToolBox.sh EjbcaWsRaCli finduser USERNAME EQUALS WebServiceCli-User1
? Question and Answers ?