%20(500%20x%20162%20px)(1).png)
Advanced Mode
Introduction
EJBCA Roles - Create Custom role
Slide Deck: EJBCA Roles
Overview: This section creates the "Custom" role, and creates a new group for this user. Refer to the chart for an overview of permissions this role is assigned.
Slide Reference
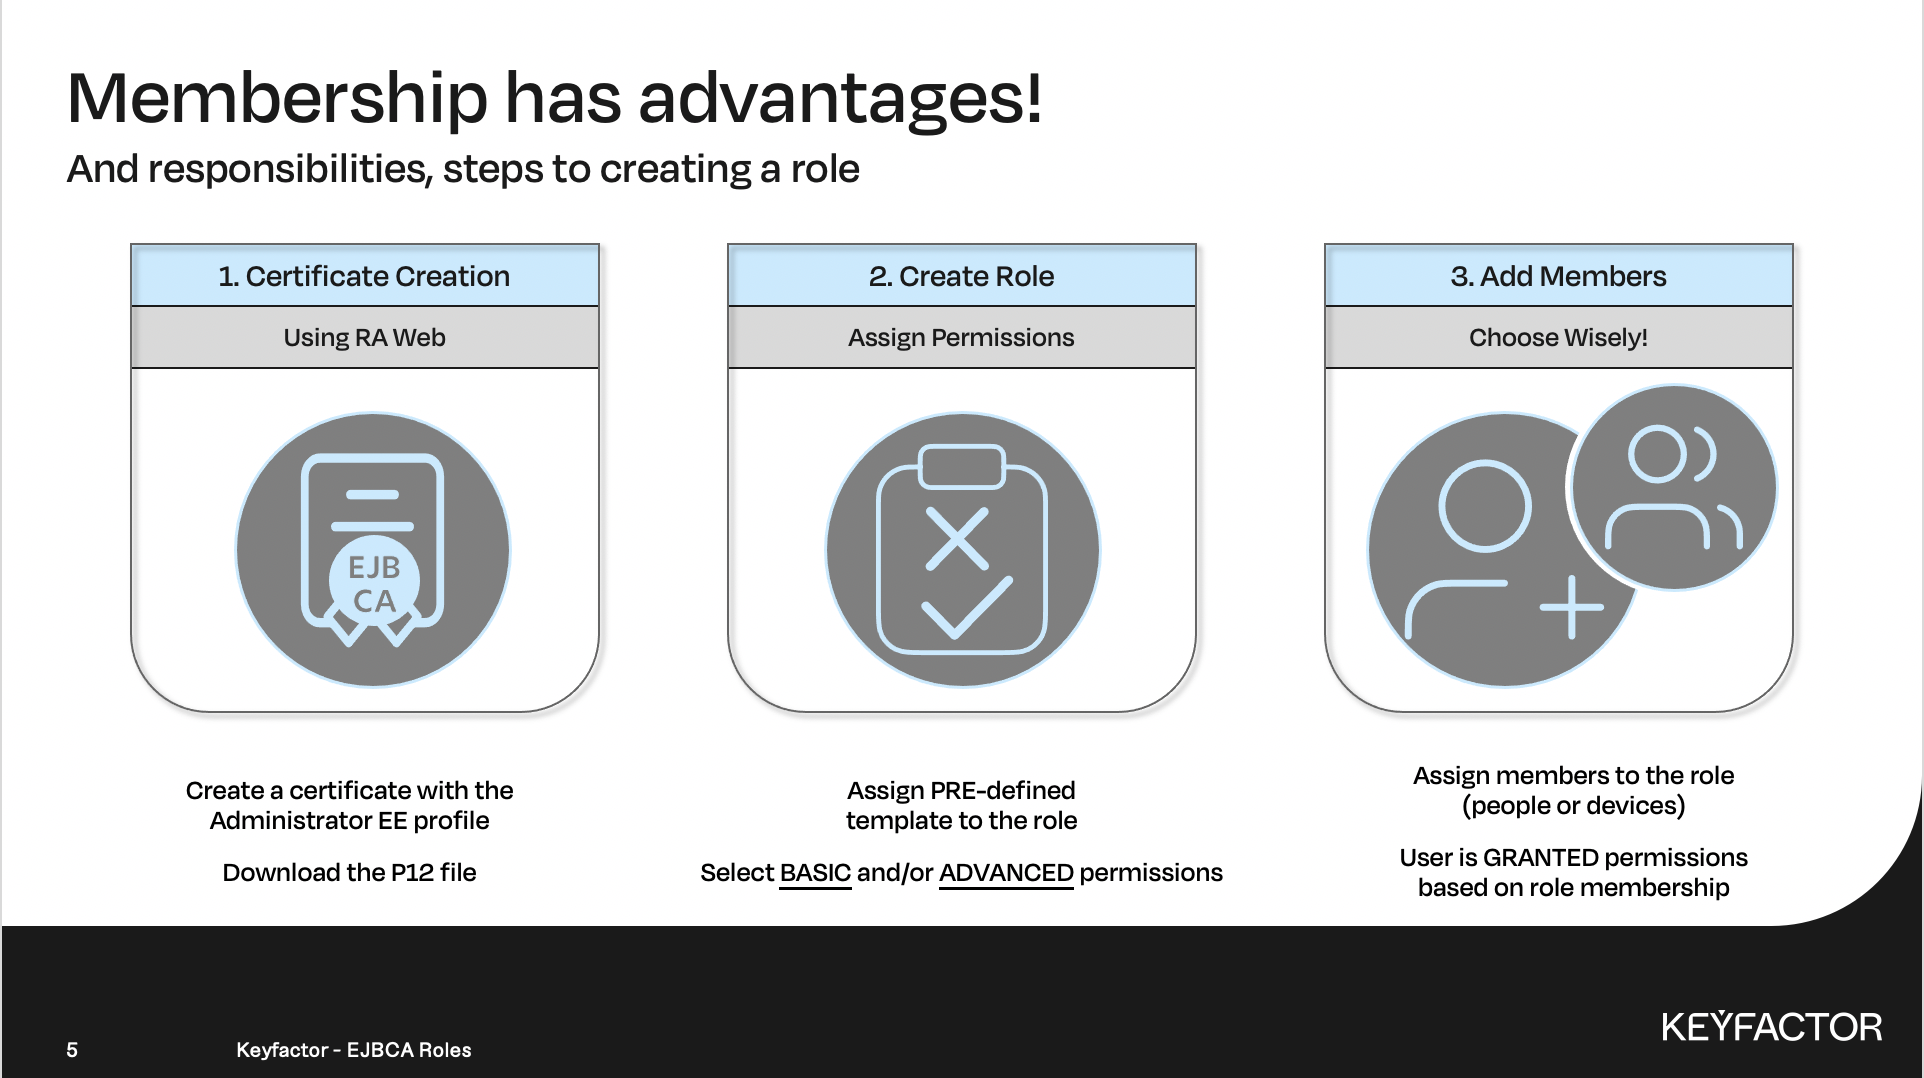
Create a certificate for the role
User is granted access based on role membership
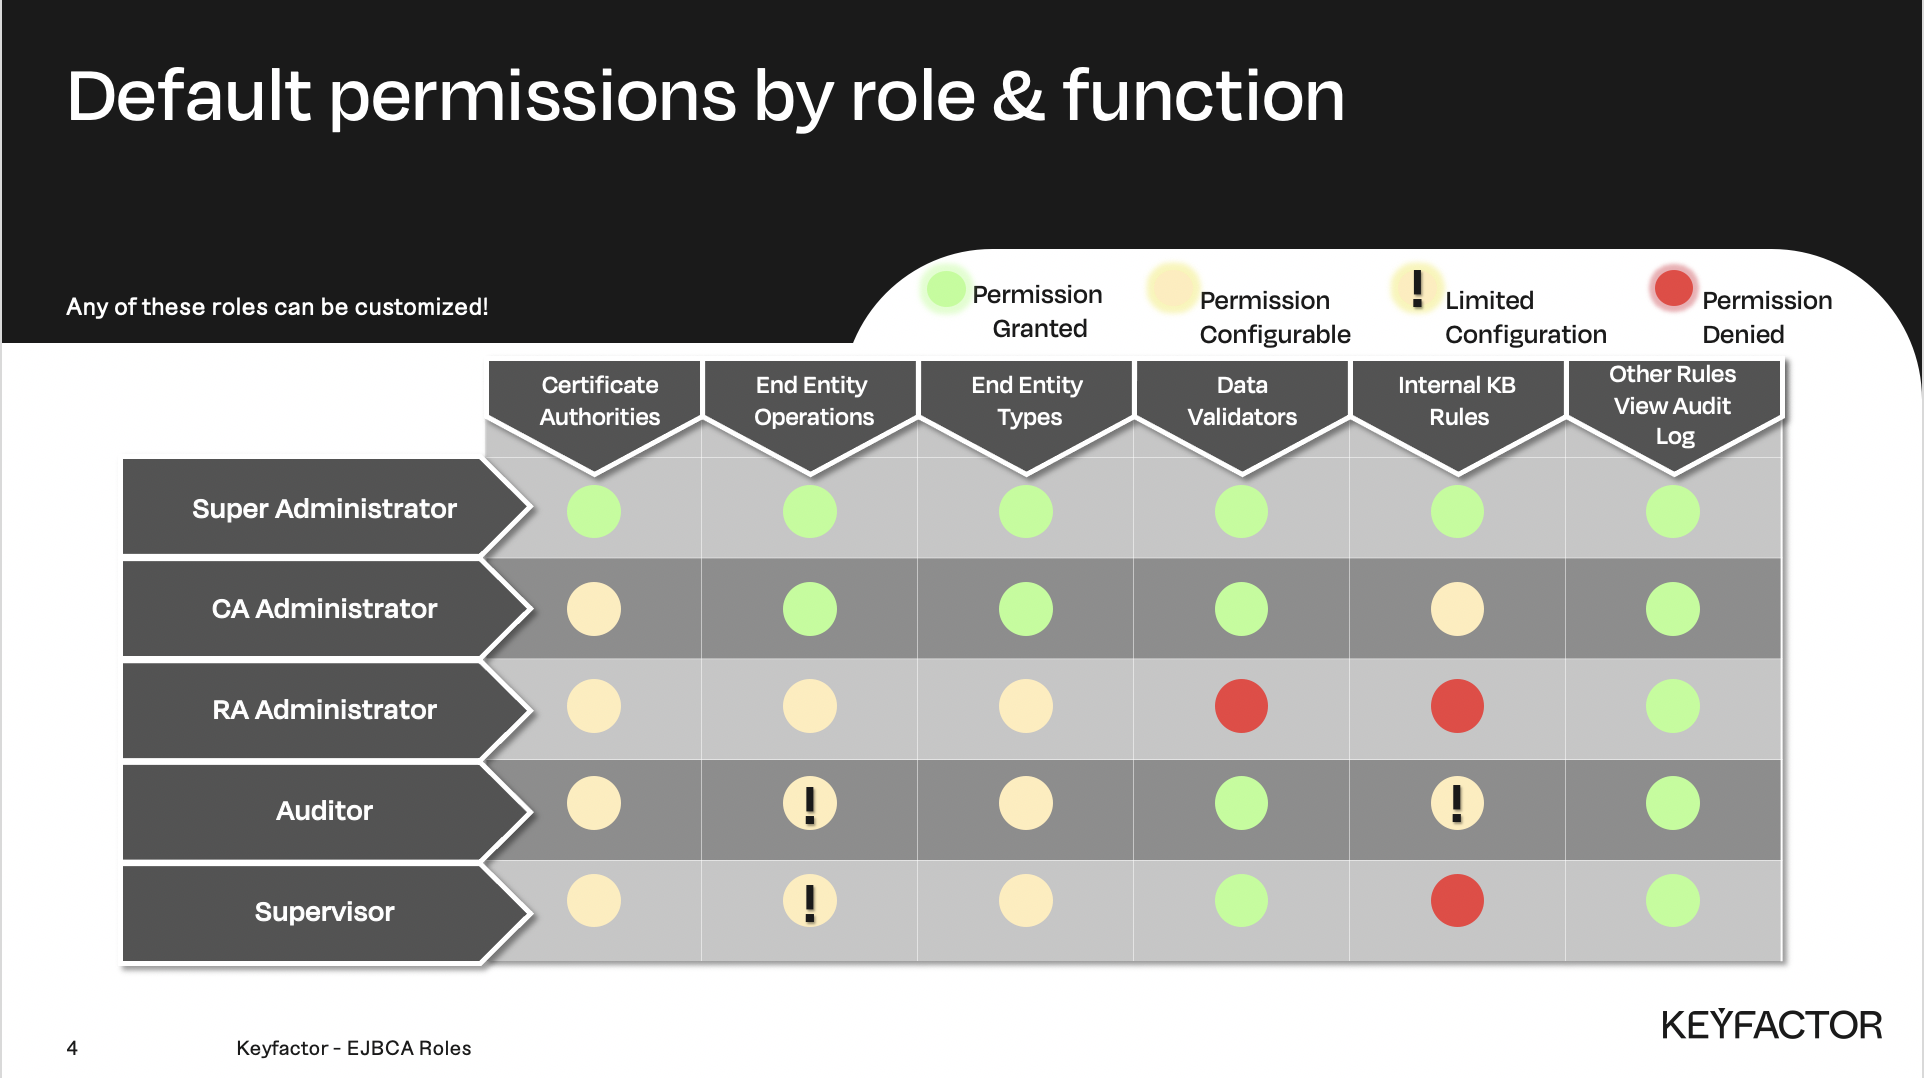
Permission matrix by role
Reminder you can visit the Accessing Your Environment page for details on how to connect to your RA web portal
Create the Custom Role Certificate
Open a browser and click RA Web, from the ribbon menu across the top of page
Click Enroll >> Make New Request
In the Certificate Type drop-down list, select AdministratorEndEntityProfile
In the Key-pair generation selection, select By the CA
In the CN, Common name field, enter training_CustomRole
In the Username field, enter training_CustomRole
In the Enrollment code field, enter foo123
In the Confirm enrollment code field, enter foo123
Click Download PKCS#12
Save the file
Import the P12 into Firefox. See the previous section entitled "Refresher on importing certificates into Firefox" under "SuperAdmin Role" for the steps.
Create a Role
Open a browser and access your Admin Web Portal
Click System Functions >> Roles and Access Rules
Click Add
Enter Training Custom Role and click Add
Create the Access Rules
On Training Custom Role click Access Rules
Click Advanced Mode
In the /administrator/ field, select Allow
In the /system_functionality/edit_administrator_privileges/ field, select Allow
In the /system_functionality/view_administrator_privileges/ field, select Allow
In the /ca/ field, select Allow
Click Save
Click Summary
Verify the following resources and rules are enabled:
Resource | Rule |
|---|---|
/administrator/ | Allow |
/ca/ | Allow |
/system_functionality/edit_administrator_privileges | Allow |
/system_functionality/view_administrator_privileges | Allow |
Click Back to Roles Management
Create the Matching Rule
On Training Custom Role click Members
In the Match With list, select X509: CN, Common name.
In the CA list, select ManagementCA
In the Match value field, enter training_CustomRole
Click Add
Click Back to Roles Management
? Question and Answers ?