%20(500%20x%20162%20px)(1).png)
Authentication Key Binding
Introduction
Key bindings and Peer Connectors
Slide Deck: Key bindings and Peer Connectors
Overview: The first step is to create the Authentication Key binding.
Create a crypto token for the Authentication Key binding on the CA instance.
Issue the certificate for the Authentication Key binding
Enable the Authentication Key binding.
Slide Reference
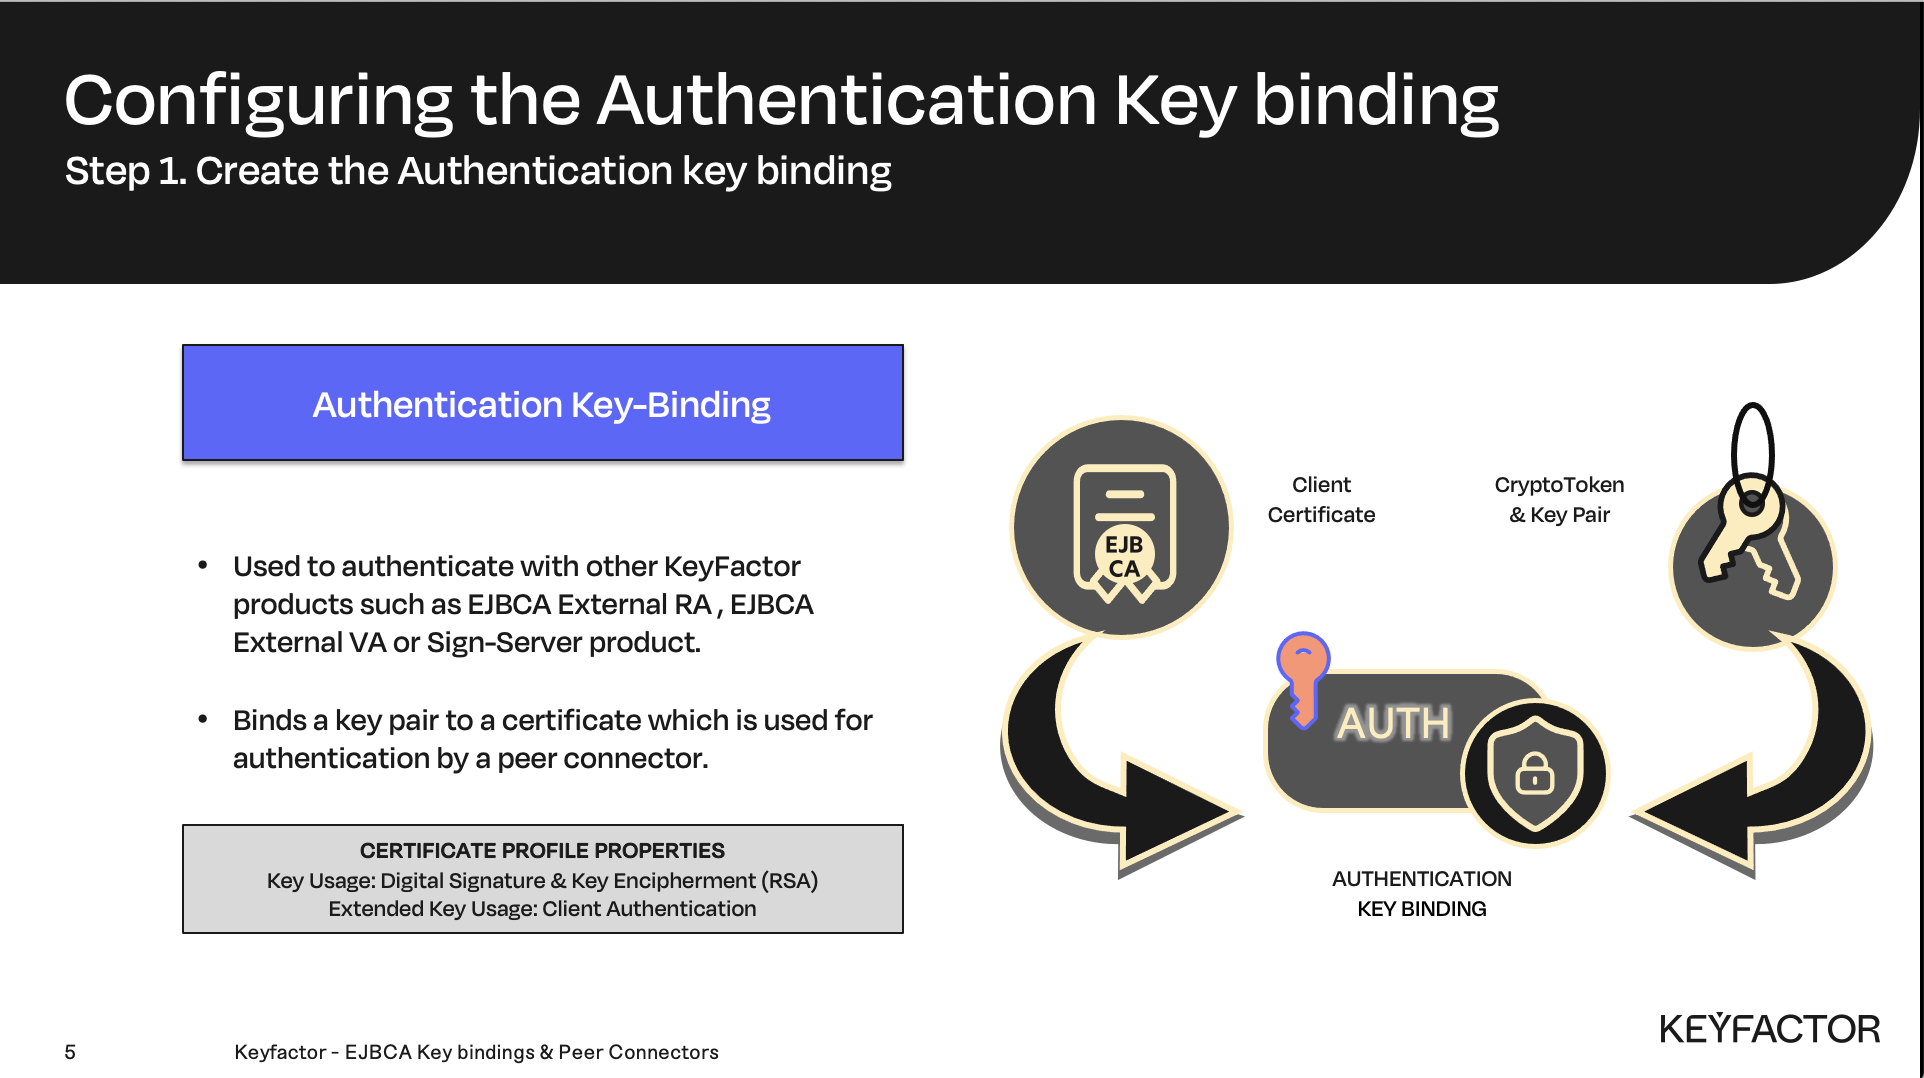
A designated certificate used to authenticate to other EJBCA instances
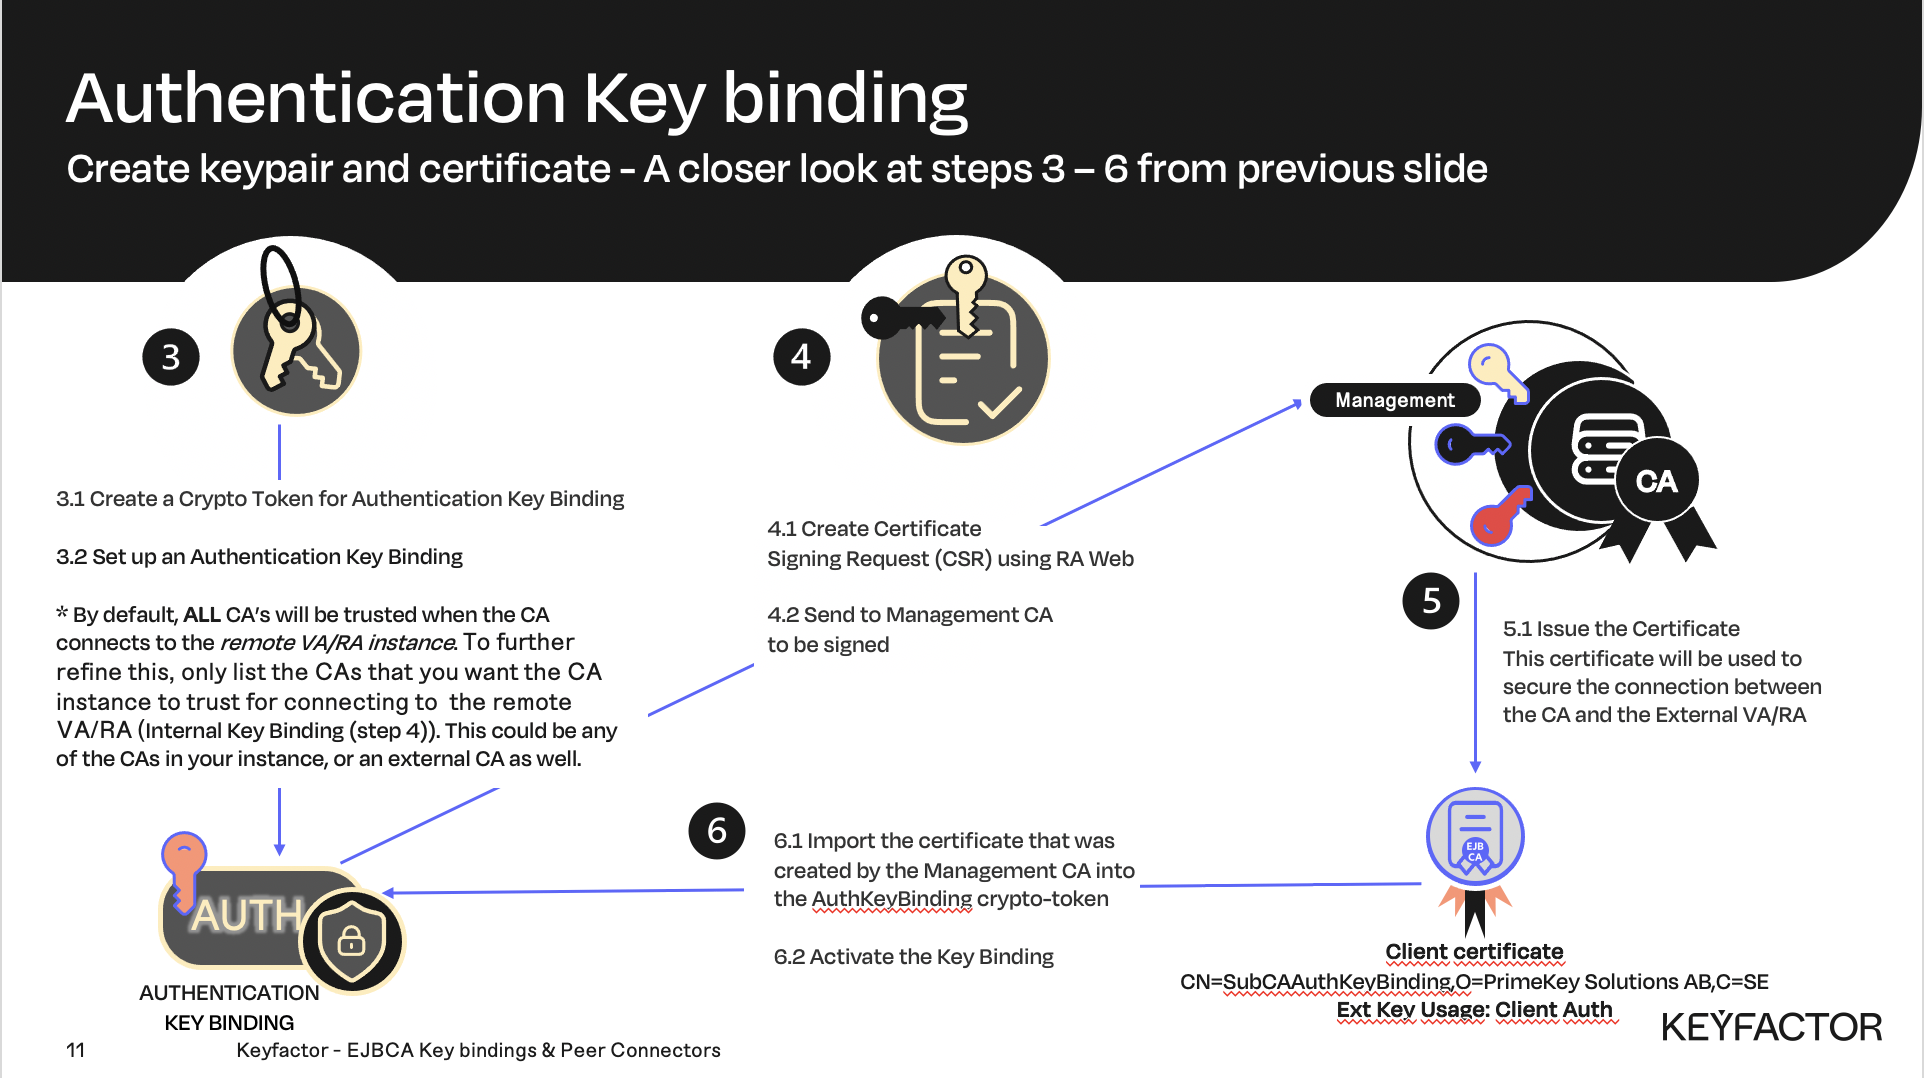
A closer look at creating the authentication key binding

Reminder you can visit the Accessing Your Environment page for details on how to connect to your Admin Web portal
Create a Crypto Token for Authentication Key Binding
Open a browser and access your Admin Web Portal on the CA instance
Select CA Functions >> Crypto Tokens
Select Create New
In the Name field, enter KeyBinding
In the Type list, select SOFT
Select Auto-Activation (Use)
In the Authentication Code field, enter foo123
In the Repeat Authentication Code enter foo123
Click Save
Enter SubCAAuthKeyBinding as the name for the new key, choose RSA 2048 from the list and click Generate new key pair
Set up an Authentication Key Binding
Click System Functions >> Remote Authentication
Click Create new…
In the Name field, enter SubCAAuthKeyBinding
In the Crypto Token list, select KeyBinding
In the Key Pair Alias list, select SubCAAuthKeyBinding
In the Signature Algorithm list, select SHA256WithRSA
In the trusted certificates section under Certificate Authority, select ManagementCA
Click Add
Click Create
Click Back to Overview
In the SubCAAuthKeyBinding row, under the Actions column click CSR
Download the SubCAAuthKeyBinding.PKCS10.pem CSR
Issue the Certificate
Open a browser and click RA Web, from the ribbon menu across the top of page from your CA instance.
Click Enroll >> Make New Request
In the Certificate Type drop-down list, select TLSClientEndEntityProfile
In the CA drop-down list, select ManagementCA
In the Key-pair generation selection, select Provided by user
Click Browse >> Downloads folder and select the SubCAAuthKeyBinding.PKCS10.pem CSR and click Select
In the CN, Common name field, enter SubCAAuthKeyBinding
In the Username field, enter SubCAAuthKeyBinding
Click Download PEM full chain
Save the file as SubCAAuthKeyBinding.pem
Activate the Key Binding
Open a browser and access your Admin Web Portal on the CA instance
Click System Functions >> Remote Authentication
Under the Import Client Certificate header, select SubCAAuthKeyBinding in the Target Remote Authenticator field
To the right of Certificate, click Browse
Click Downloads locate the certificate that was downloaded in the previous section, the file should be named SubCAAuthKeyBinding.pem
Click Select
Click Import
In the SubCAAuthKeyBinding row, under the Actions column, click Enable