%20(500%20x%20162%20px)(1).png)
LDAP Publisher
Introduction
EJBCA Publishers
Slide Deck: EJBCA Publishers
Overview: This part of the lab configures an LDAP publisher. If you wish to publish to an LDAP directory or Active directory instance (separate publisher), these are the types of information that would be required to setting up the publisher.
NOTE: the lab environment does not have a running LDAP directory, but setting up this publisher is needed when configuring the Multi-group publisher which is coming up.
Slide reference

Publisher queue options - this section is common to ALL publishers
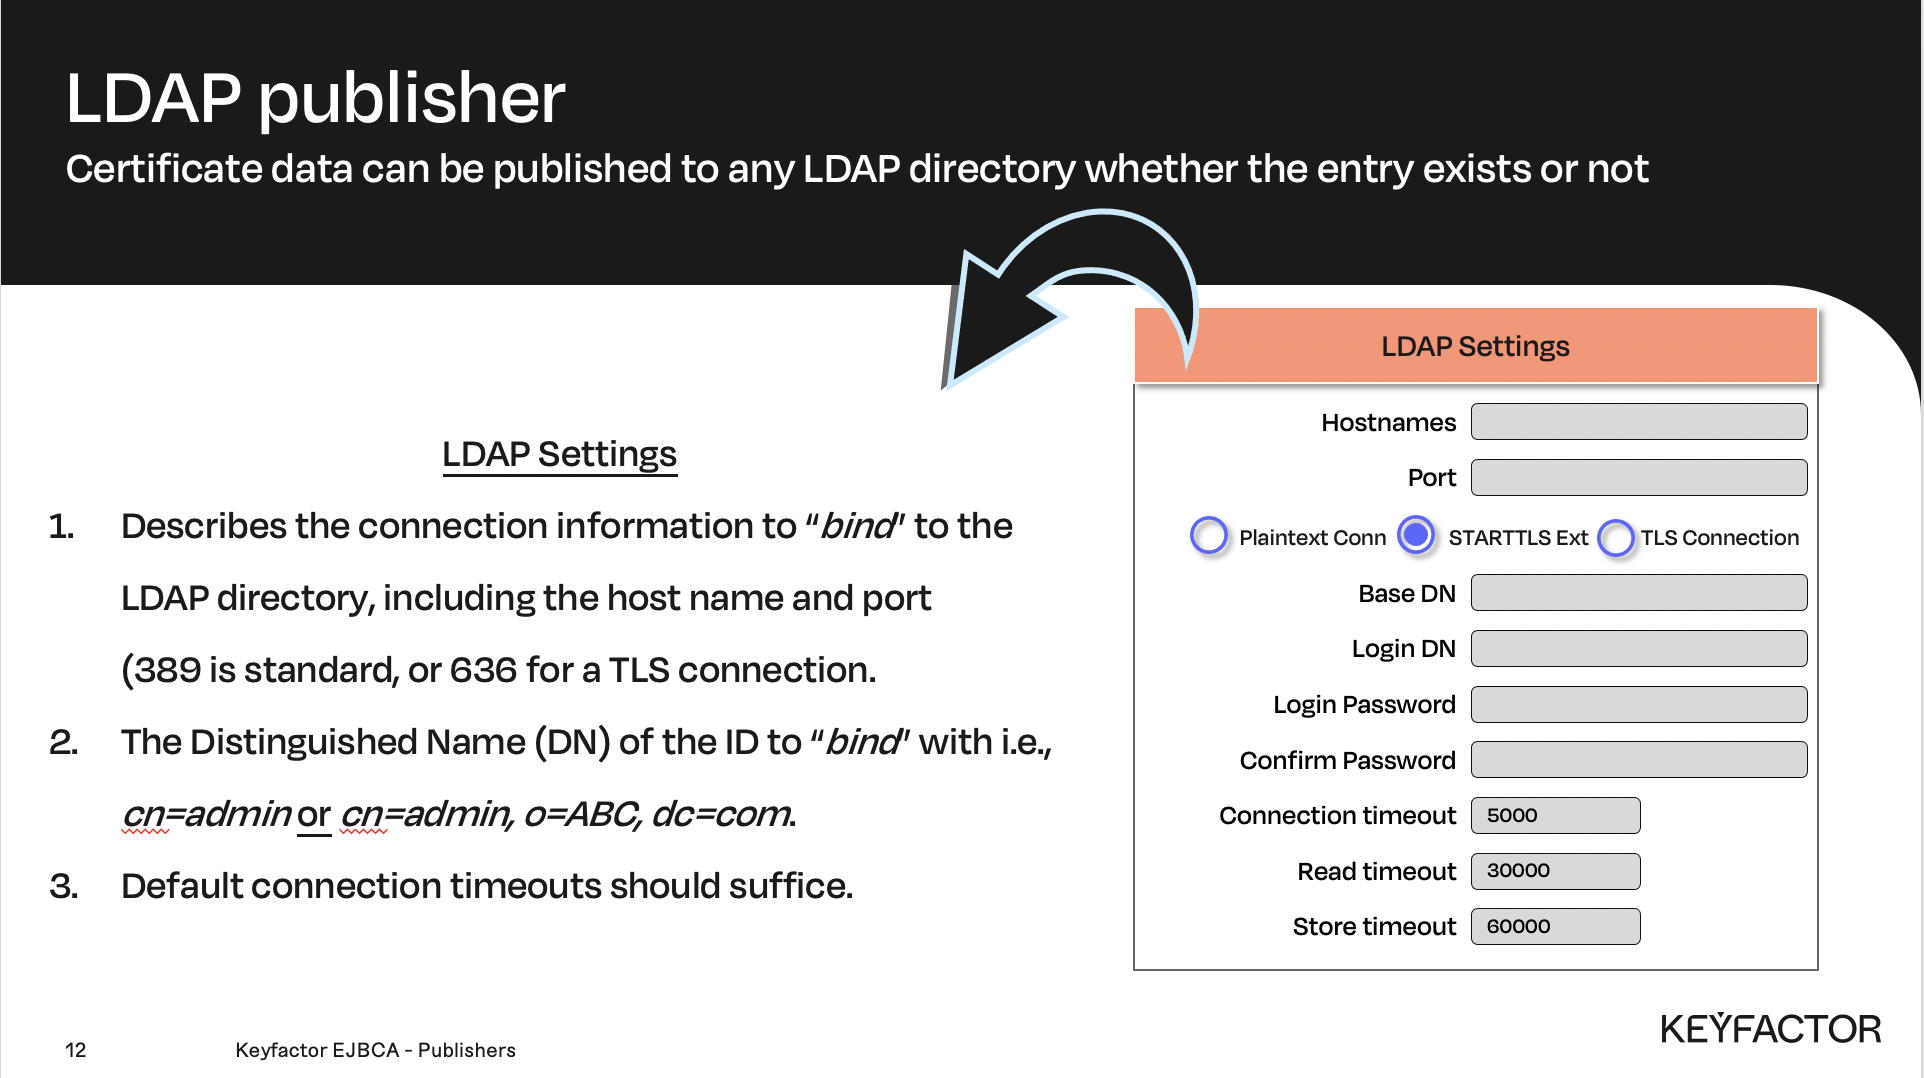
LDAP specific publisher settings
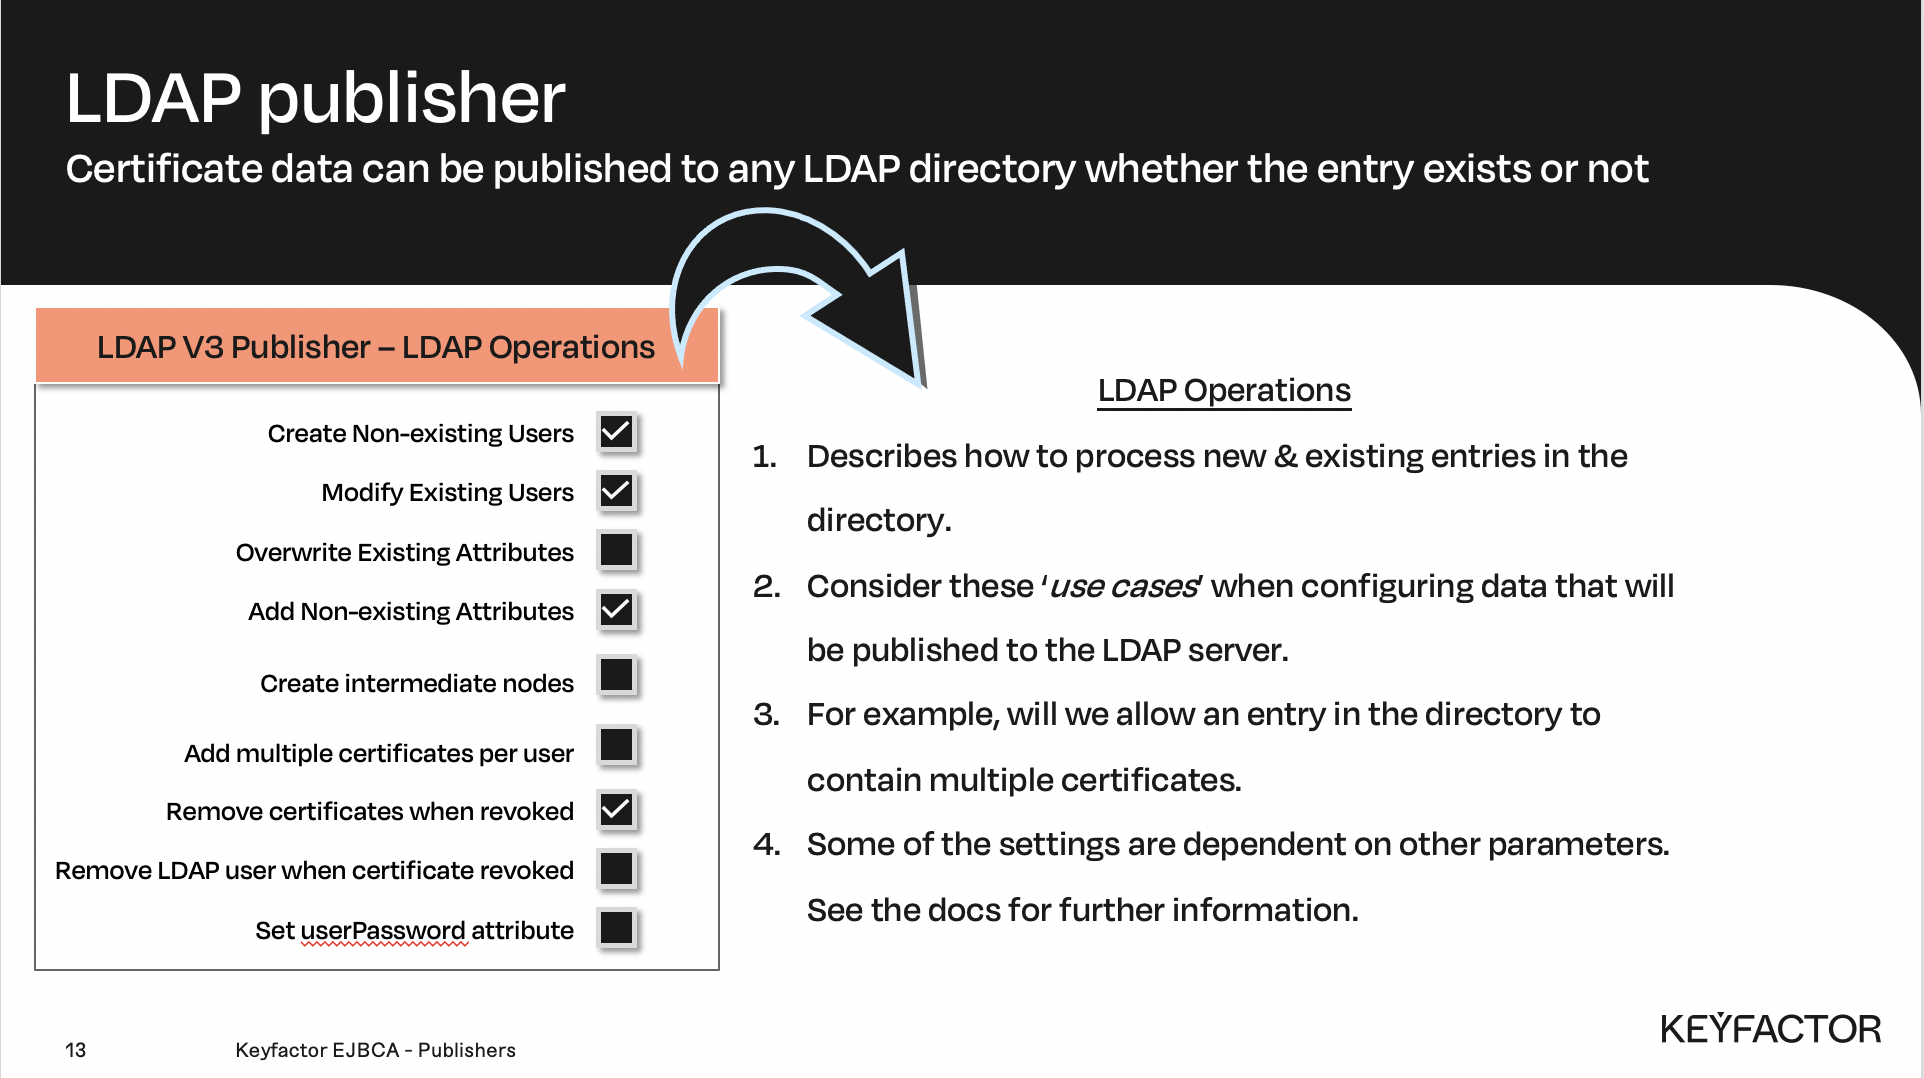
LDAP specific publisher settings
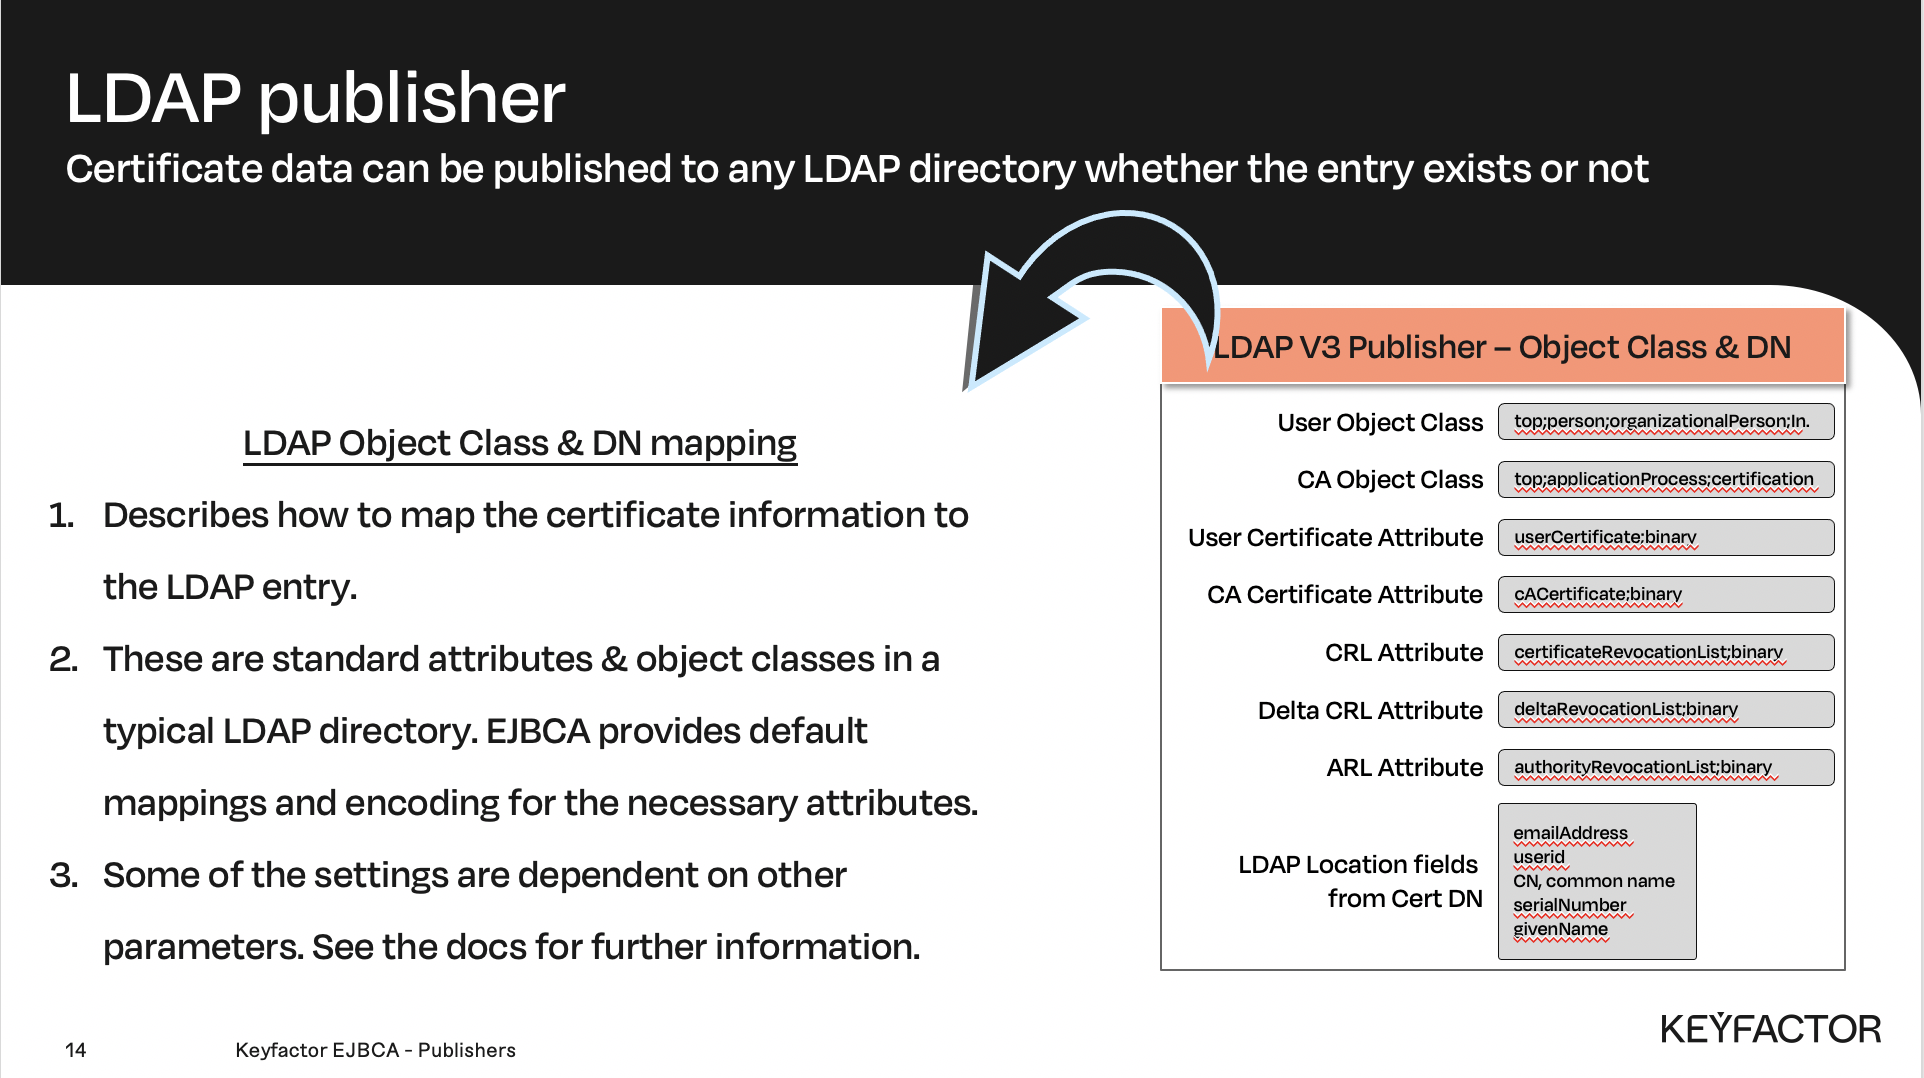
LDAP specific publisher settings

Reminder you can visit the Accessing Your Environment page for details on how to connect to your Admin web portal
LDAP Publisher Configuration
Open a browser and access your Admin Web Portal on the CA instance
On the CA, click CA Functions >> Publishers
In the Add Publisher field, enter LDAP Publisher and click Add
In List of Publishers, select LDAP Publisher and click Edit Publisher
In the Publisher Type list, select LDAP V3 Publisher
In the Hostnames field, enter ca.primekey.training
For the Port field, select the Plaintext Connection radio button.
In the Base DN field, enter o=PRIMEKEY,c=SE
In the Login DN field, enter cn=ejbca,o=PRIMEKEY,c=SE
In the Login Password field, enter foo123
In the Confirm Password field, repeat foo123
In the LDAP location fields from certificate DN selection field, select:
CN, Common name
O, Organization
C, Country
For the Publisher Queue option No direct publishing, only use queue, check the Use checkbox.
Click Save and Test Connection (the connection will fail since the LDAP-server is not installed). The following error will be displayed “Following error occurred when testing connection LDAP Publisher: Error binding to LDAP server. Connect Error.”