%20(500%20x%20162%20px)(1).png)
Enable Peer Connector
Key bindings and Peer Connectors
Slide Deck: Key bindings and Peer Connectors
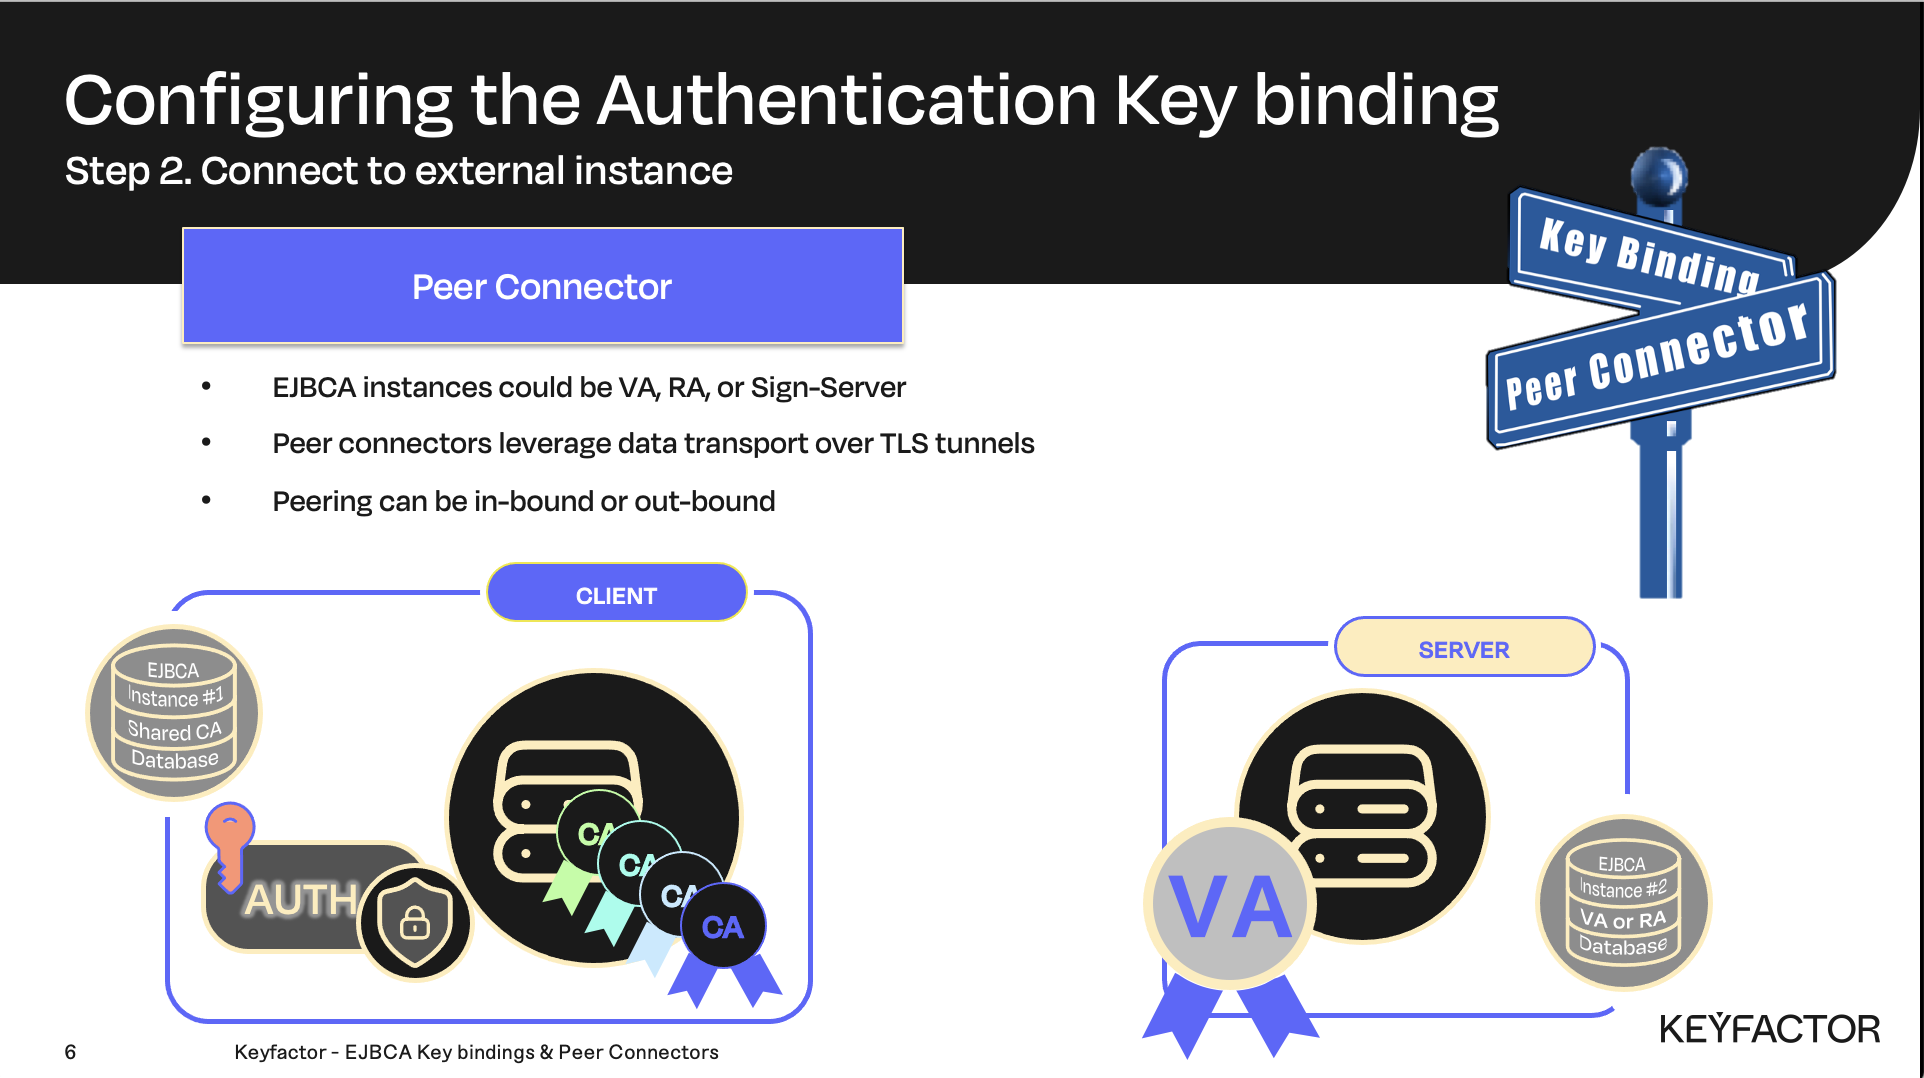
Overview: The second step is to connect to the Peer system.
Identify the system you wish to establish the mTLS connection with.
Import the CA certificates on the VA instance (these certificates are required for subsequent modules).
Capture the CA information using a PING request, and create/modify the VA role.
Verify the connection to the VA.
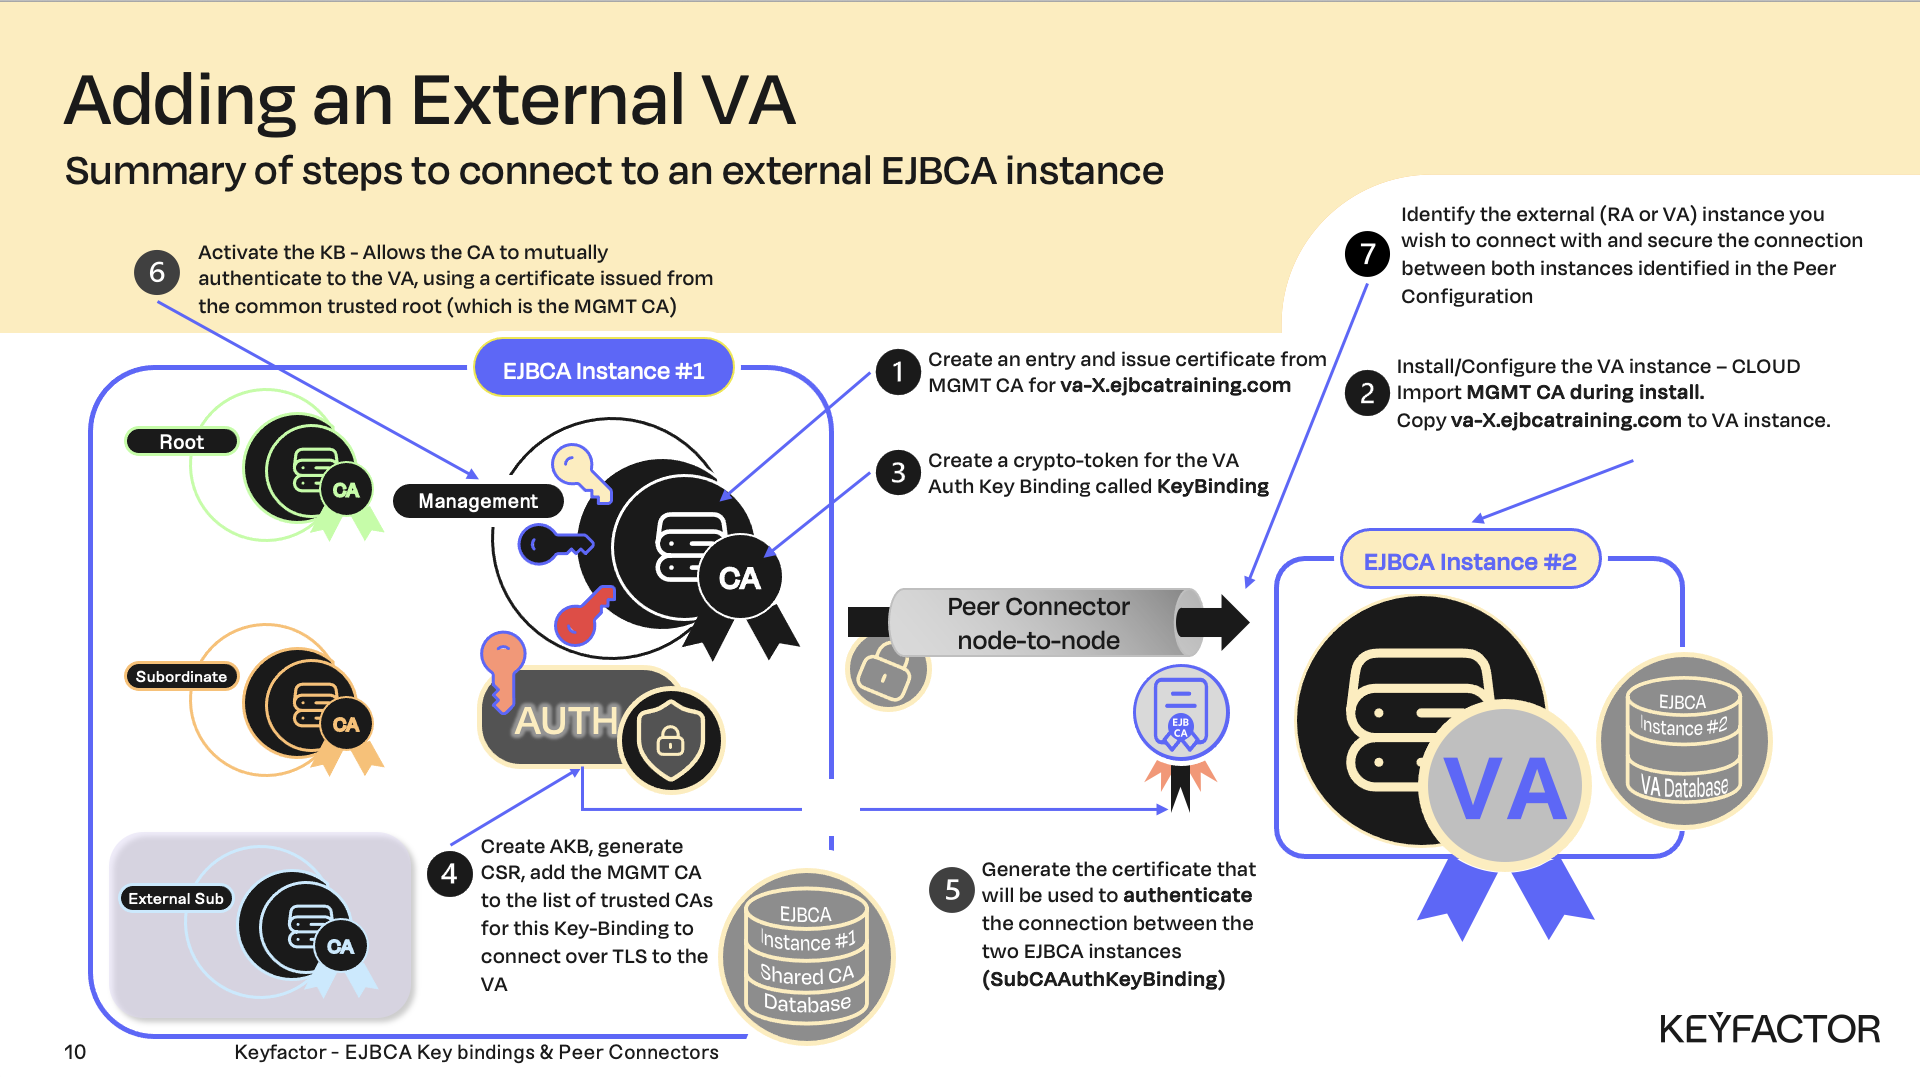
Steps required to add an external Validation Authority (VA)
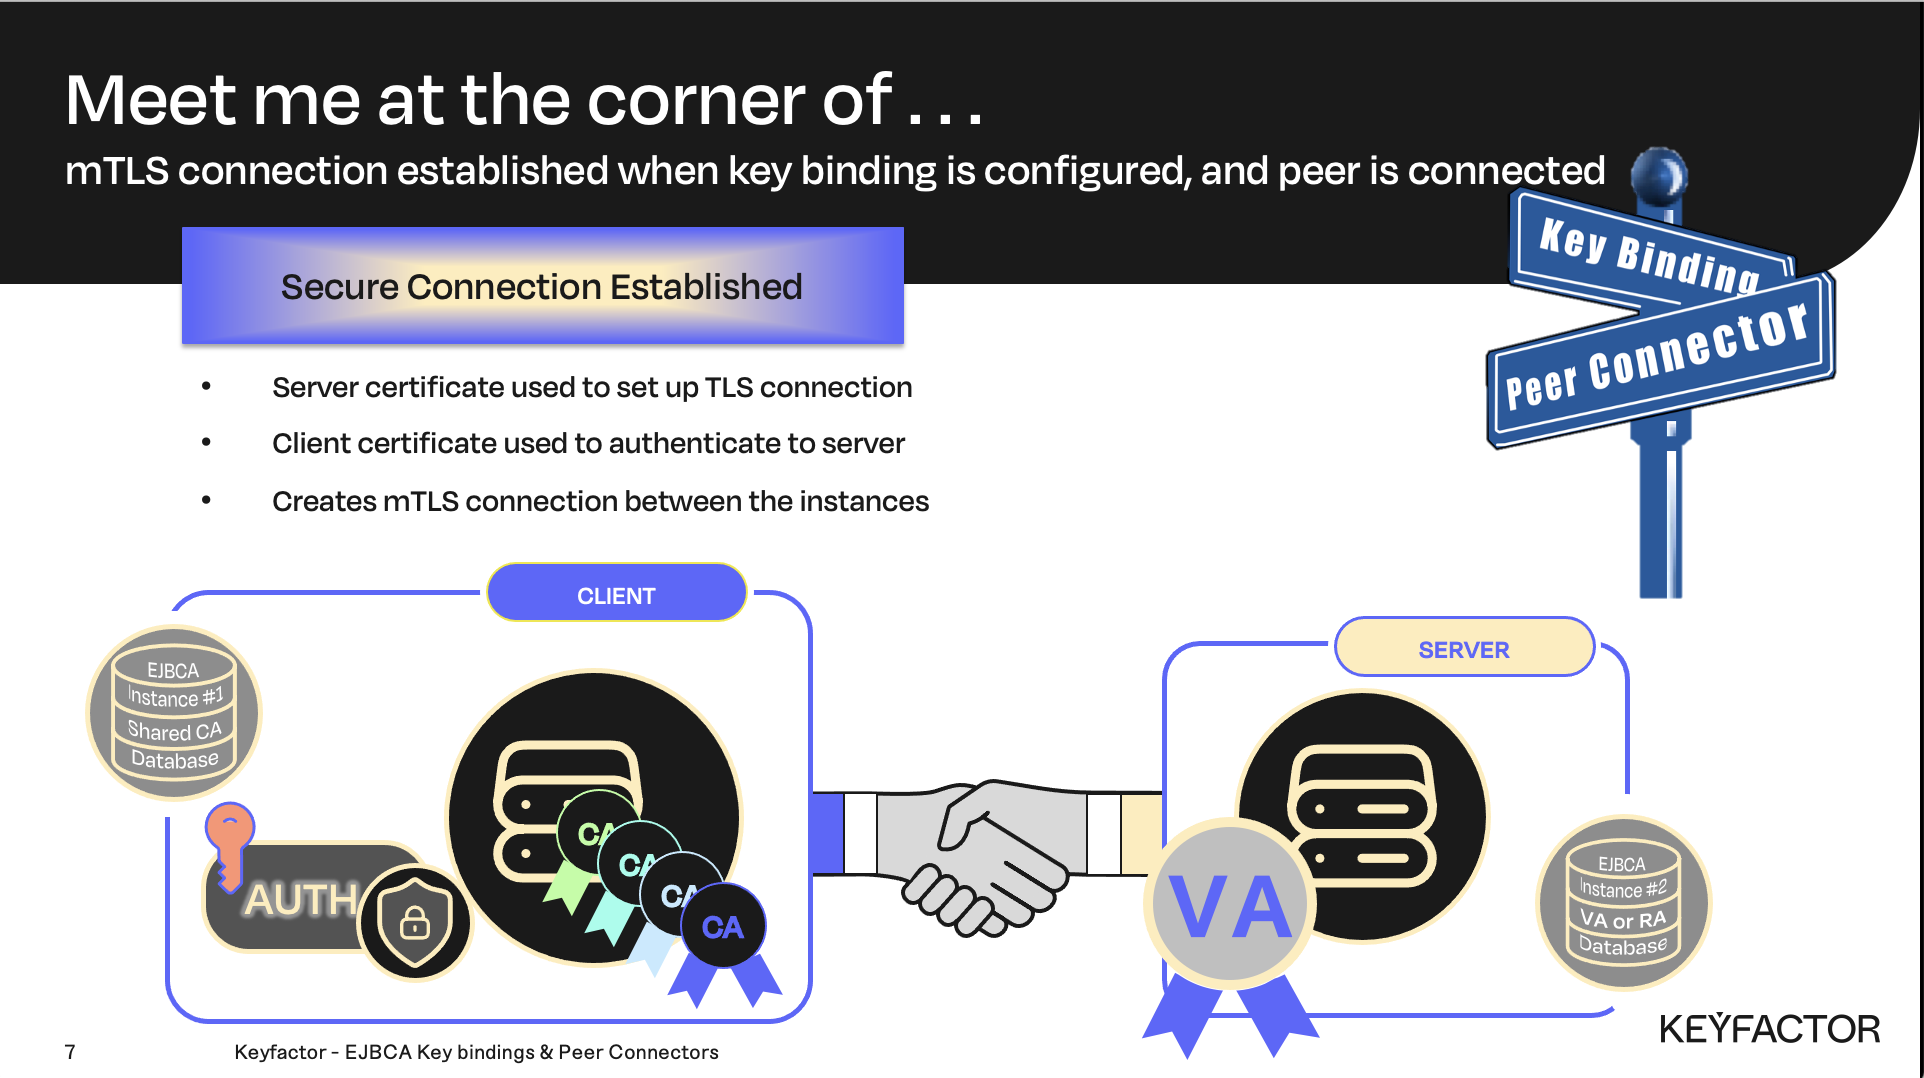
Key bindings and Peer connectors establish two things a TRUSTED and ENCRYPTED connection
Configure the certificate used to authenticate to the CA instance
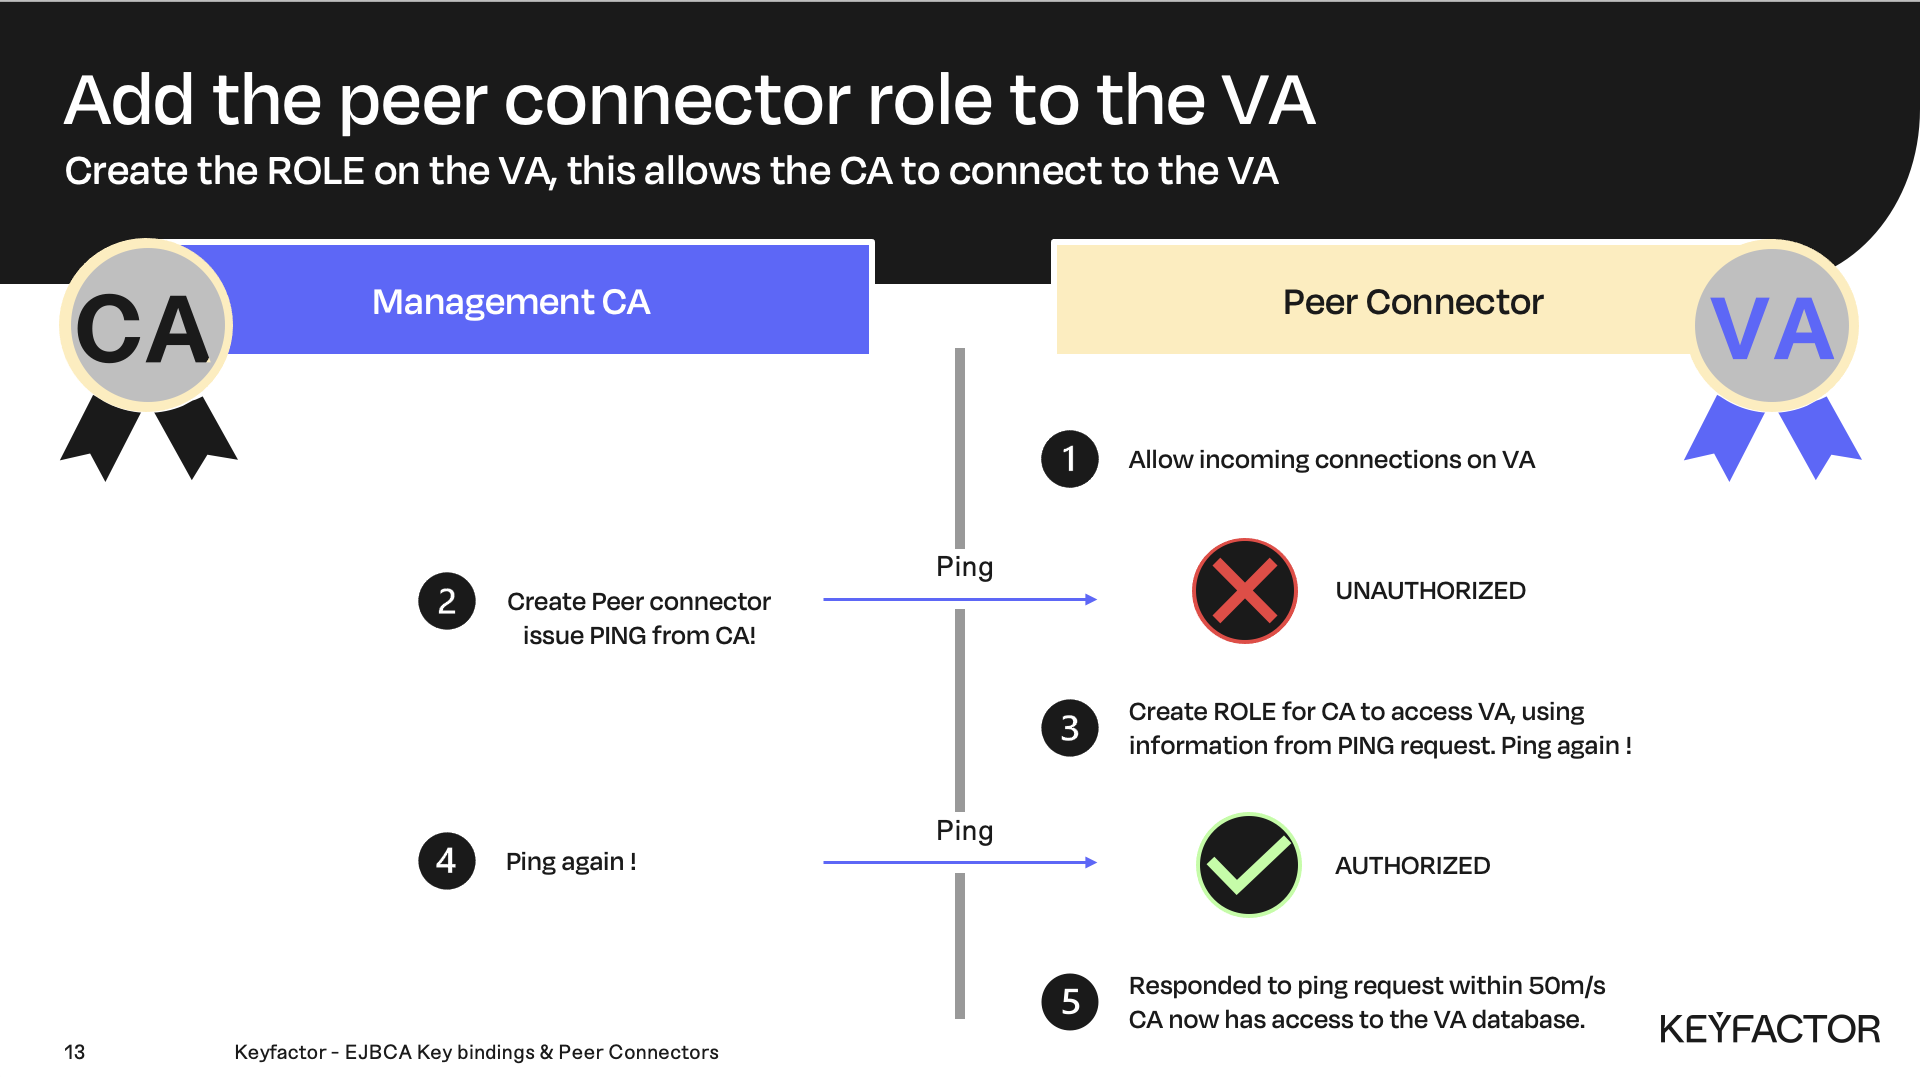
Create a role for the VA
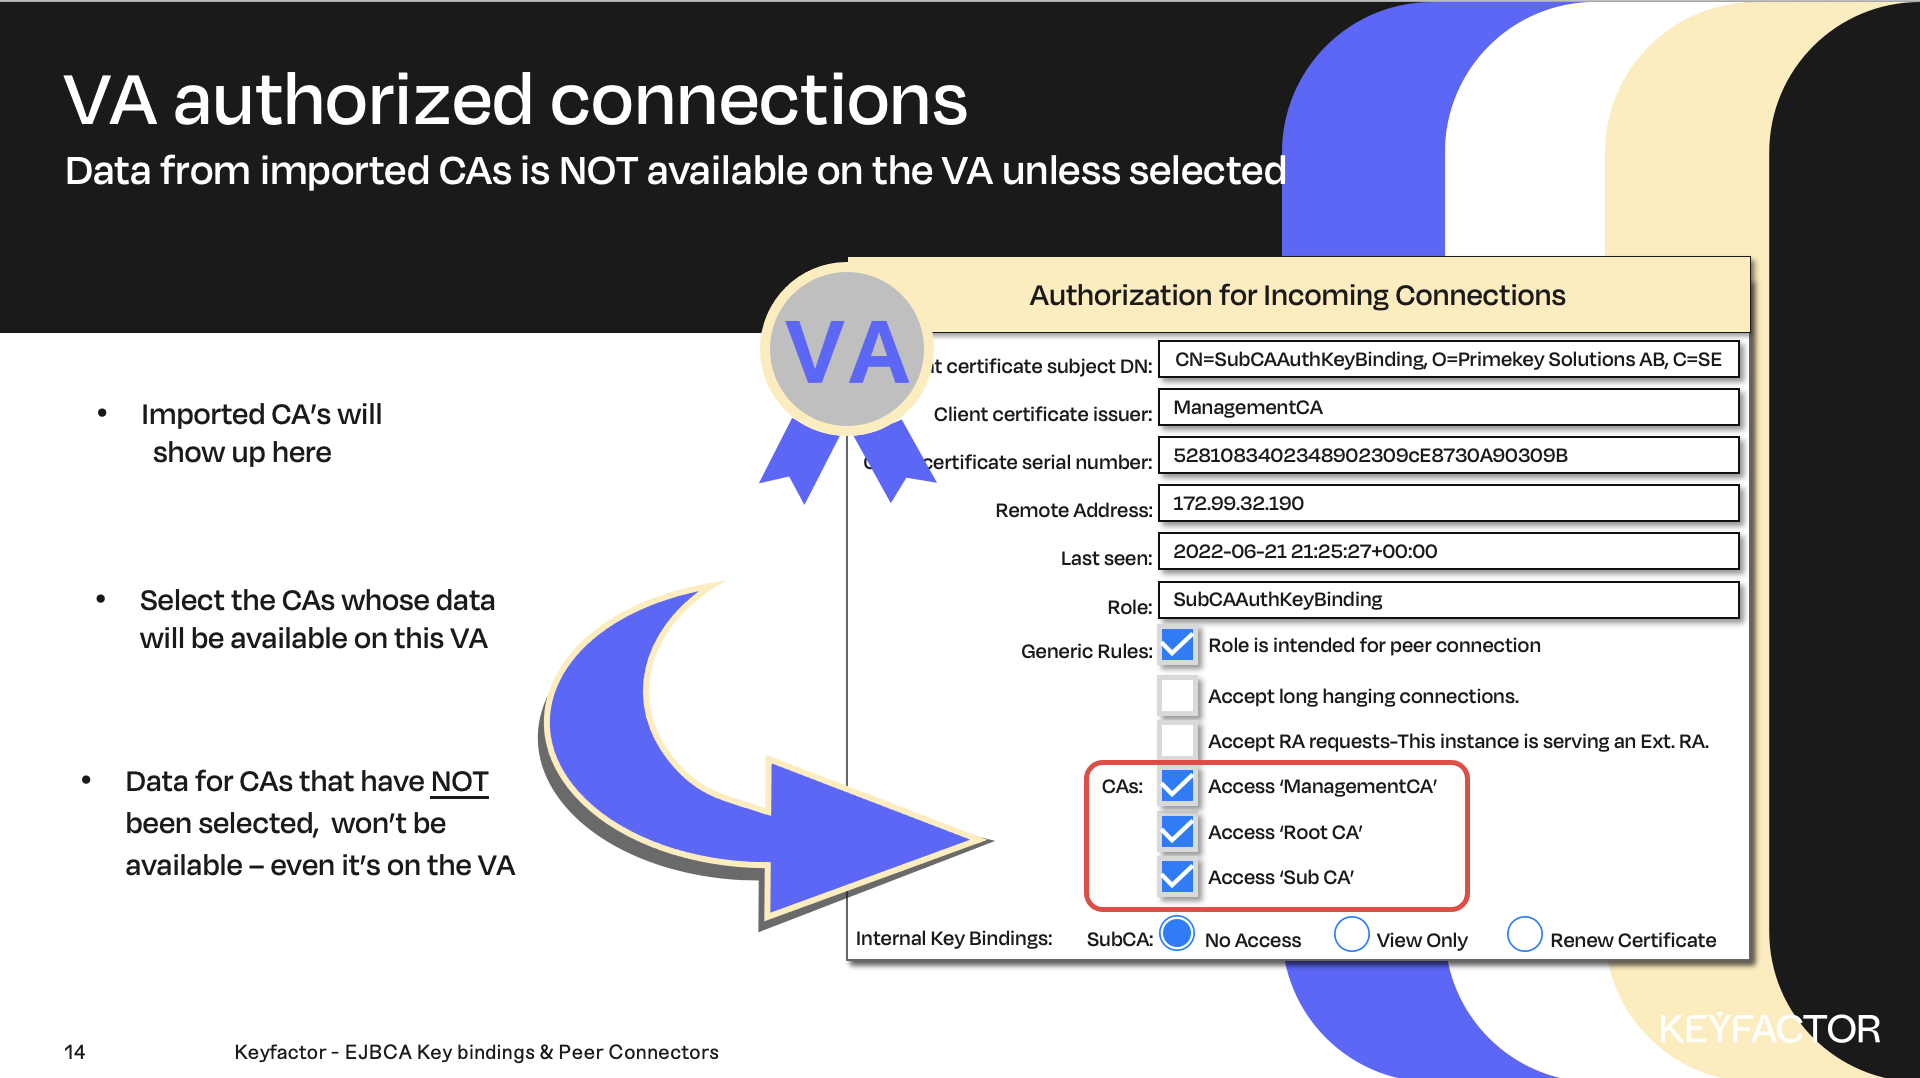
Decide which CA’s data will be available on the VA

Reminder you can visit the Accessing Your Environment page for details on how to connect to your Admin Web portal
Setup Peer Connector
Open a browser and access your Admin Web Portal on the CA instance
Select System Functions >> Peer Systems
Ensure that only the Allow Outgoing connections option is selected
Click Add
In the Name field, enter PeerConnector
In the URL field, change the IP address to the OCSP server hostname: https://va.keyfactor.training/ejbca/peer/v1
if no DNS is available, ensure that the VA is accessible by adding a host record to the CA /etc/hosts file
This has already been done for you.
In the Authentication Key Binding drop-down list, select SubCAAuthKeyBinding
Click Create
Export the Sub CA and Root CA
Open a browser and access your Admin Web Portal on the CA instance
Under CA Functions >> CA Structure & CRLs
Under the section Details of Certificate Chain for CA: Sub CA, click Download PEM file under Subordinate CA, level 1
Ensure to download the file for the Sub CA and not its root certificate
Under the section Details of Certificate Chain for CA: Root CA, click Download PEM file
Import the Sub CA and Root CA to the VA

Reminder you can visit the Accessing Your Environment page for details on how to connect to your Admin web portal for your VA instance
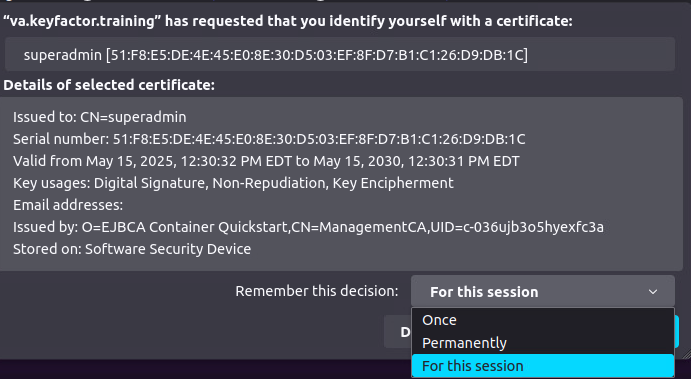
You will be prompted to choose a certificate when logging into the VA for the first time. Select the superadmin certificate, select one of 3 options for the session duration (once, permanently, or for this session).
Once means, you’ll get prompted everytime you access the VA for a certificate,
Permanently means your choice will be remembered, and will not be prompted again, and
For this session, means as long as this window is open you will not be prompted again.
Open a browser and access your Admin Web Portal on the VA instance
Click CA Functions >> Certification Authorities
Click Import CA certificate...
In the The name this CA will be given field, enter Sub CA
Click Browse, click Downloads to locate the Sub CA certificate, this should be named SubCA.cacert.pem, click Select
Click Import CA certificate
Click Import CA certificate...
In the The name this CA will be given field, enter Root CA
Click Browse, click Downloads to locate the Root CA certificate, this should be named RootCA.cacert(1).pem, click Select.
NOTE: The file was downloaded in the previous labs, the (1) will be appended to the filename. If it was the first time being downloaded it would not have the (1).
Click Import CA certificate
Enable the Peer connectors
Click System Functions >> Peer Systems
Enable the Allow incoming connections option
Clear the Allow outgoing connections option
Make a ping from the CA
Open a browser and access your Admin Web Portal on the CA instance
Click System Functions >> Peer Systems
Click Ping next to the PeerConnector peer connector
Confirm the text Unable to connect to peer. status code: 401, reason phrase: Unauthorized is displayed
Authorizing User on the VA
Open a browser and access your Admin Web Portal on the VA instance
Click System Functions >> Peer Systems
Under incoming connections, confirm there is an attempted connection from the CA
Click Create Role
In the Role list, select Create new role
Click Select
Select the following options:
CAs: Check the box for:
"Access ManagementCA"
"Access Root CA", and
"Access Sub CA"
Publishing: Check the box for:
Publish certificate,
Compare certificate synchronization status and
Publish CRL
Click Create New Role
Check the Connection on the CA
Open a browser and access your Admin Web Portal on the CA instance
Click System Functions >> Peer Systems
Click Ping next to the PeerConnector peer connector again
Confirm there is a similar response stating Responded to ping request within 33 ms, this will prove the peer connector is working
? Question and Answers ?